"The greatest fine art of the future will be the making of a comfortable living from a small piece of land."
-Abraham Lincoln
Showing posts with label toys. Show all posts

Doggie Doughnut


I've made toys for each of my kids but I can't forget my furry friends either.
SO....I made this frosted doughnut amigurumi toy for Cookie, my mini doxie.


You can get the pattern on the lionbrand website here.
You could even add a squeaker when you stuff it to add extra puppy fun.

She seems more interested in the treat I was holding to get her to look at the camera than in the doughnut itself.

Kitty Amigurumi

I've finished the toys for the boys and have moved on to a cute little toy for Oldest.  

An amigurumi (ah-mee-goo-roo-mee) kitty cat.
In pink (Oldest's favorite color) pajamas no less.

I was inspired by the pink jammies kitty on Armina's Ani-mals blog.
Although I didn't use her pattern (I made my own up based on general knowledge of amigurumi and crochet techniques) the two look very similar.
The main differences are the ears, I've included a tail, and the arms and legs of mine are a bit larger. 
Still if you like the kitty you can make one very close to it by following the pattern on Armina's blog.  Or...if you really like my kitty you can also ask for my pattern.
I don't have it written down but I would be more than happy to share it if there seems to be a demand for it.

The nice thing about amigurumi is that it's EASY and quick.  I made this kitty in just a couple of hours.


In amigurumi almost everything is made in the round with single crochet.
Each section is made seperately (usually) then pieced together.
This is the start of the kitty's head.


I embroidered eyes, a nose, and whiskers to make her face.


Then I crocheted her hood and sewed it to her itty bitty head.


Then came the ears.


Which were attached to the her head.


The arms, legs, and tail came last. 


The end result was one satisfied little customer.

Counting Fish

In keeping with my little blog mini series on toys...I've posted some counting fish I've made for Middle.   The idea came to me to make some small counting toys during one of my many attempts to help my 3 year old understand the concept of "more" and "less".

I thought about making up my own crochet pattern for them, but decided (in the interest of time) to check online for a pattern instead.  Viola!  I found a cute one here.  I modified the pattern a bit to make my fish a little "stumpier".  I wanted fish that looked sort of like Goldfish crackers.

Stage one of a little blue fish.  The pattern called for a size G hook and everything is done with single crochets in the round.  Easy peasy lemon squeezy.


The almost completed fish.  In order to make them a little shorter in body I omitted rows 8-9 in the pattern.


A finished fish.  The eyes are french knots made with black yarn.


Then it's just a matter of repeating the process for each color.


My completed "school" of fishies. 
Each fish took about 10 minutes to make and, as you can see, I made 2 of each color.
A really quick, cute project to help the little ones learn their numbers, colors, basic math.
You can make as few or as many as you need depending on the time you have to devote to the project.
Middle definately loves the fish and I really think they are helping him understand the concept of more and less, many and few, etc.

Feeling Better

Swine flu seems to be flying out of the building...soo I've been able to do a little crafting.

First up on the list, I made a neat little nesting baby toy.


This is a super easy craft that requires a little bit of straight stitching and some hot glue.


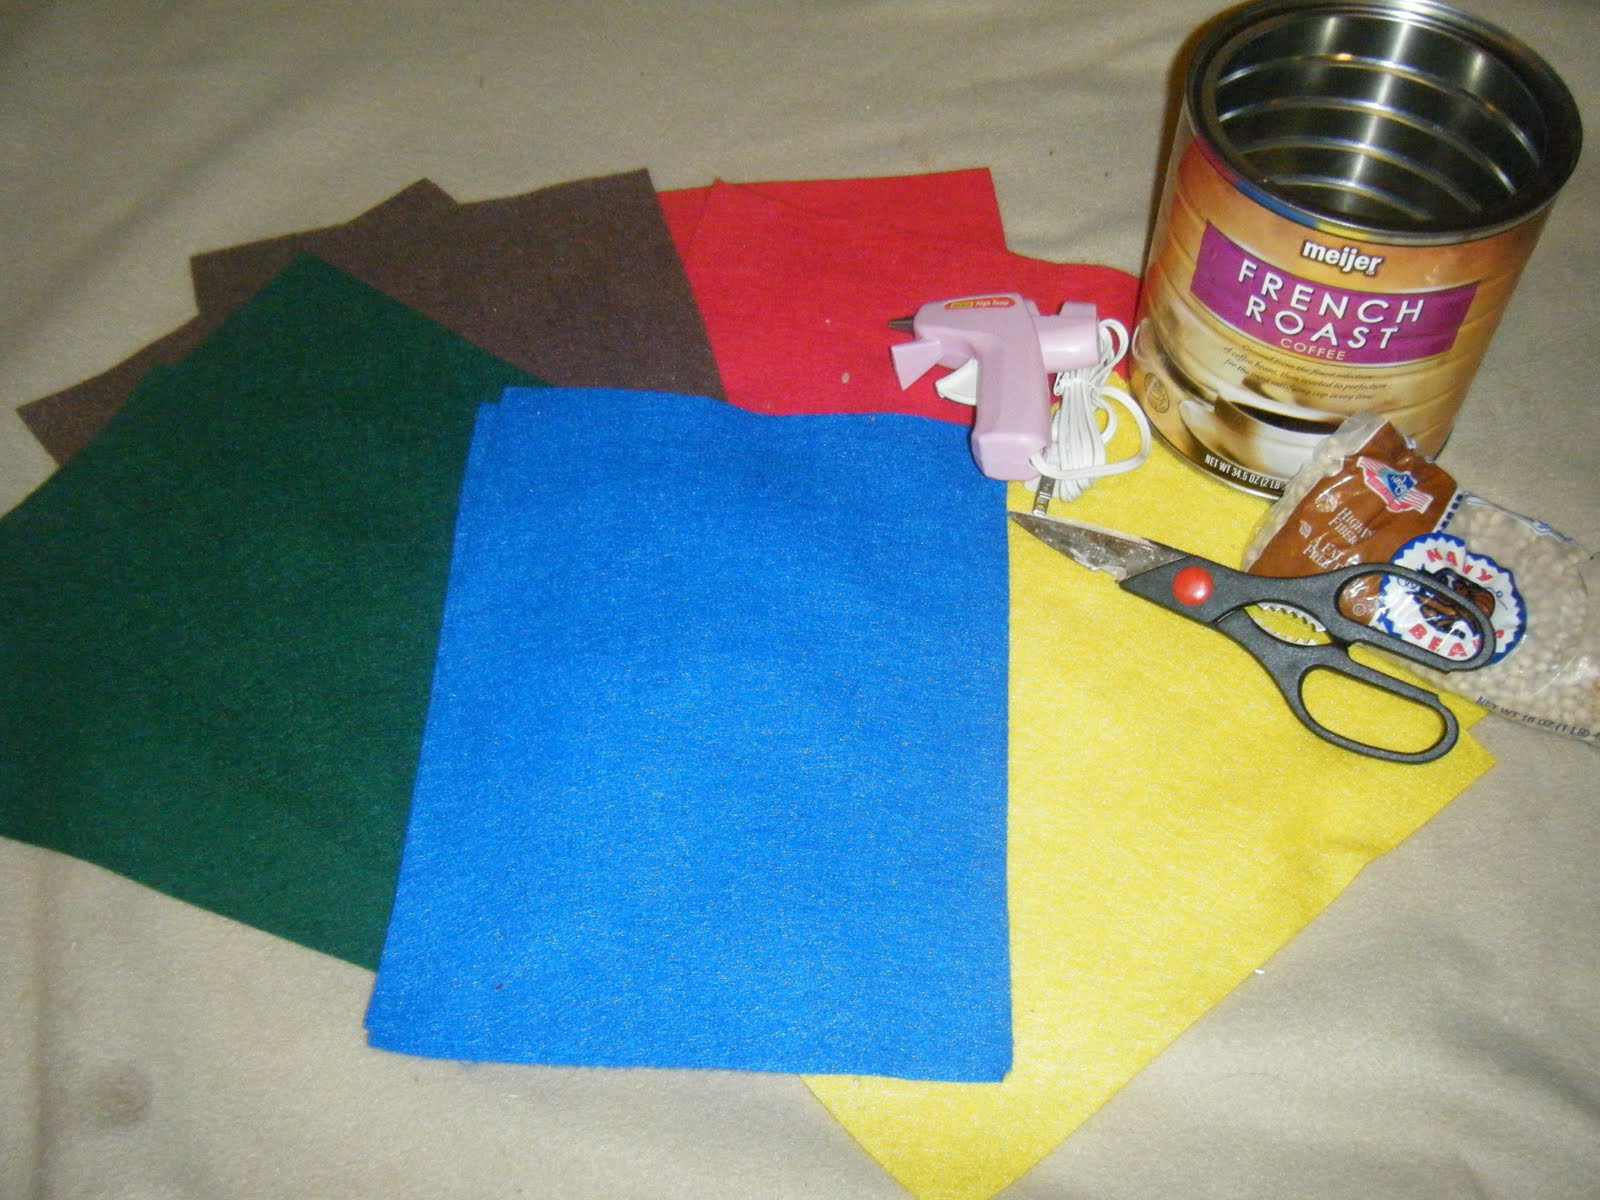
First, gather you're supplies.  You'll need a clean coffee can.
A hot glue gun. A bag of dry beans (I used navy beans). Scissors.
Several different colored pieces of felt or fabric (2 of each color).
A washable marker or fabric pen.

 
The first step is to wrap your coffee can with some felt or fabric. 
Start by wrapping the fabric around the can and marking the fabric at the top of the can with a washable marker or fabric pen.
Then unwrap and cut at the line you just marked.
Get your hot glue gun and attach the larger piece of fabric to the can with a strip of hot glue.
Continue to attach the fabric around the can with the hot glue until it completely covers the outside of the can.


Next, onto the shapes.
You'll want to pick out 2 of the same color fabric for each shape.
I drew these basic shapes onto the felt free hand, but you could use a template and create any kind of shape or combination you would like.
You could even use two different fabrics depending on how you wanted the completed pieces to look.
Make sure to mark a space on your shapes about 1 1/2 inches across to leave open for turning and stuffing.


Next, sew along the outline of the shape, leaving the space between your markers open.
Be sure to back tack at the start and finish points of your shape so that you can turn inside out without popping the stitches.
Then cut the shape out with your scissors..


Turn the shape inside out.


Repeat the process for each of your other shapes.


Now comes the fun part.
Get your beans ready and begin to pour your beans (very carefully...those things go all over) into the opening in your shapes.
Fill the shape until you are happy with the weight and feel.
Then hand sew the opening closed SECURELY. 
Remember that this is for a baby or young child and small beans and little mouths don't mix so you want to make sure that everything is sewn up securely.


You can embelish the can with more little bits of fabric cut into shapes and then hot glued on or you could sew them on before you attach it to the can.


Then sit back and watch the little ones enjoy your handy work.


This is a cool little project because the possibilities with it are almost endless.  You can embelish the coffee can any way you like.  You could use ribbon, buttons, etc (as long as everything is attached securely).
You can use different fabrics, appliques, ribbons on the bean bag shapes.  You could even insert a bell or crinkle plastic. It's a really great project to flex those creative muscles and become an awesome sensory experience for your baby.
It also serves as it's own toy box.  When the fun is done, put the bags in the can, snap the lid back on and you're good to go.
All at a price tag under $5.   Can't beat that.