"The greatest fine art of the future will be the making of a comfortable living from a small piece of land."
-Abraham Lincoln
Showing posts with label homesteading. Show all posts

Homemade Dog Food

Our dog is an important member of our family.  She's our pet.  She's a protector of our family and our home.  She's a playmate for our children.  She's a companion for my husband and myself.  When we have to go out and work in freezing cold temperatures or during the wee hours of the morning or in the blistering heat of the sun, she's right there with us.  She doesn't complain about the cold or the rain or grumble that she's just too tired.  She just wants to be with us.

It's true that the life of a farm dog can be a hard one.  There are hazards and harsh conditions not experienced by those dogs living the high life in Manhattan apartments or neatly manicured suburban homes.  We counter the harshness of farm life by making sure we keep her up-to-date on her shots, get her regular check-ups at the vet even though she hates that, and feeding her  nutritious food. 

Years ago, when I was still relying heavily on convenience foods for myself and my family, I saw no problem feeding my dog cheap, store brand dog food.  I figured it was sound nutrition and really didn't worry about it.  It wasn't until I started to research nutrition for my family and started to change our diets that I began to reconsider what my dog was eating.  I started to realize that dog food suffered from many of the same, if not worse, problems that overly-processed, pre-packaged foods meant for human consumption suffered from. It was low on nutritive value, it was full of weird fillers and chemicals and it could lead to problems like obesity, heart disease, allergies, cancer and diabetes.  So we decided to go a more natural route for our dog.  We wanted to feed food that contained natural, healthy ingredients but good quality pre-made dog food is downright expensive.

After talking to her vet we came up with an even better alternative.  We would make her food ourselves.  Let me stop here a minute.  If you are thinking about making your own dog food for your furry friend it's important to talk to their vet first.  They can give you a handle on what your individual pet will need in terms of balance, supplements, amount, etc.  That's what we did for our dog.  We sat down with her vet and came up with a recipe for her that includes chicken or beef, sweet potato or oatmeal, brown rice or oatmeal, and spinach or kale.  I try to prepare two weeks worth of food at one time and I'll switch out the recipe the next time I prepare it to keep her from getting bored with it.  So, for one two week period it will be chicken, sweet potato, brown rice and kale and the next it will be ground beef or liver, oatmeal and spinach. 

The preparation is super simple.  I really just put everything except the kale or spinach into a large pot of water, bring it all to a boil together and then let it simmer for an hour or two or however long needed to cook the meat through, then I throw in the greens and simmer a few minutes longer, drain everything and dump it all into a really large bowl.
If I've made chicken I will separate the meat from the bones and shred it before adding it into the bowl.  Then I simply mix it all up, mashing the sweet potatoes as I go, until it's all combined.  The end result isn't much to look at, but, as you can clearly see, she thinks it tastes great.
The result of feeding her homemade food has been remarkable.  Her coat is much healthier.  She has more energy.  Her eyes are brighter.  She has less gas (that's something we ALL benefit from) and even her poo is smaller and more solid.  And she no longer has anymore problems with dry itchy skin.

All told making her food ourselves has been no more expensive than buying a bag of the cheap store brand dog food and not much more effort either.   Win/win.

Welcome 2014!

The new year has started off with a bang.  With the record breaking cold spells we've been having in the Midwest, most of our time so far this year has been spent trying to prepare for, survive through, and repair after the bitter arctic temperatures we keep experiencing.  You know you're in trouble when it's warmer in Alaska than it is in the lower 48 states. 

Cleaning the chicken coop and collecting eggs have become two of my least favorite chores, as the chicken coop is in the large barn clear at the other edge of the property from the house.  Walking out there in -40 degree wind chills has been no picnic.  We prepared the barn well for the first blast from the polar vortex by sealing up as many holes as we could find, shutting both of the large doors and putting up temporary windbreak walls made out of sheets of plywood wherever we felt necessary.  That prep has kept the chickens well and happy but, even with all of that, our eggs have not fared nearly as well.  We average a dozen eggs a day, even during the winter, and the last few weeks we've lost more than half of them to freeze. 

Still the ones that we manage to salvage are beautiful, large and extremely nutritious.  We've built quite a large client base around the area for our eggs.  We sell a little more than half of the six to seven dozen we bring in each week, not to shabby if I do say so myself.

The cold weather has taken it's toll on more than just our eggs.  We all have been getting cabin fever.  I've been grouchy, the kids are grouchy, the hubby is grouchy, heck even the dog is grouchy.  So to lift our blues away I decided to make one of our favorite treats, homemade fruit leather!  I went with an old standby of mixed berries, banana, half a lemon (for kick) and a drizzle of honey for added sweetness. 

The berries were ones that we had frozen from the spring and summer.  I used a mixture of rasberries, blueberries and wild strawberries.  The banana would have been a bit better if it had been a little more ripe, but, hey, you use what you have, you know? 

Anyways, put three cups of any mixture of berries that suits you into a medium sauce pan.  Add one whole banana and the juice from one half a lemon. Turn the heat to medium low and simmer until you get a nice berry, banana, lemon sauce going.  I simmered mine gently for about a half hour until it looked like this:

Let me just say that after about ten minutes of cooking these berries your entire kitchen is going to smell AMAZING!  

Now there are two schools of thought on the next step, those who strain and those who do not strain.  Either way is fine but if you choose not to strain it will take the fruit leather CONSIDERABLY longer to set up and "leatherize" in the oven.  I choose to strain the liquid at this point and it finishes for me in less than half the normal time.   

After simmering and straining, you place the mixture into a blender or food processor and blend it until it is smooth.  Then you spread it out as evenly as is humanly possible onto a cookie sheet lined with parchment paper.  You'll make your life much easier if you tape the parchment paper edges to the cookie sheet before hand, just a little tip.  

After smoothing it out, you'll place the cookie sheet into an oven preheated to the lowest setting possible, in my case that would be 170 degrees.  Leave the oven door open a bit and wait, and wait.....and wait.  At 170 degrees and after straining it took my fruit leather approximately 4 hours to set up.  With a lower temperature and/or omitting the straining you'll be looking at six to eight hours, approximately.  You'll know the fruit leather is finished when it is no longer sticky and no longer wet but still soft and pliable.  If it's brittle and cracking you cooked it too long so it's not a bad thing to check on it every hour or so.  

Once out of the oven you can invert take off the tape and invert it onto a clean cutting board.  At this point I trim up the parchment paper and cut the fruit leather into long, 1 inch wide strips.  Then I roll it and give it to the kiddos and the hubby.  If there is any left, and that's a big if, it goes in an airtight container in the fridge where it will keep for at least a week (that's the longest we've gone before eating it all).  

Now isn't that pretty?  And yummy too.  


Canning Apples

 My jars are sterilized and ready to go in the waterbath canner

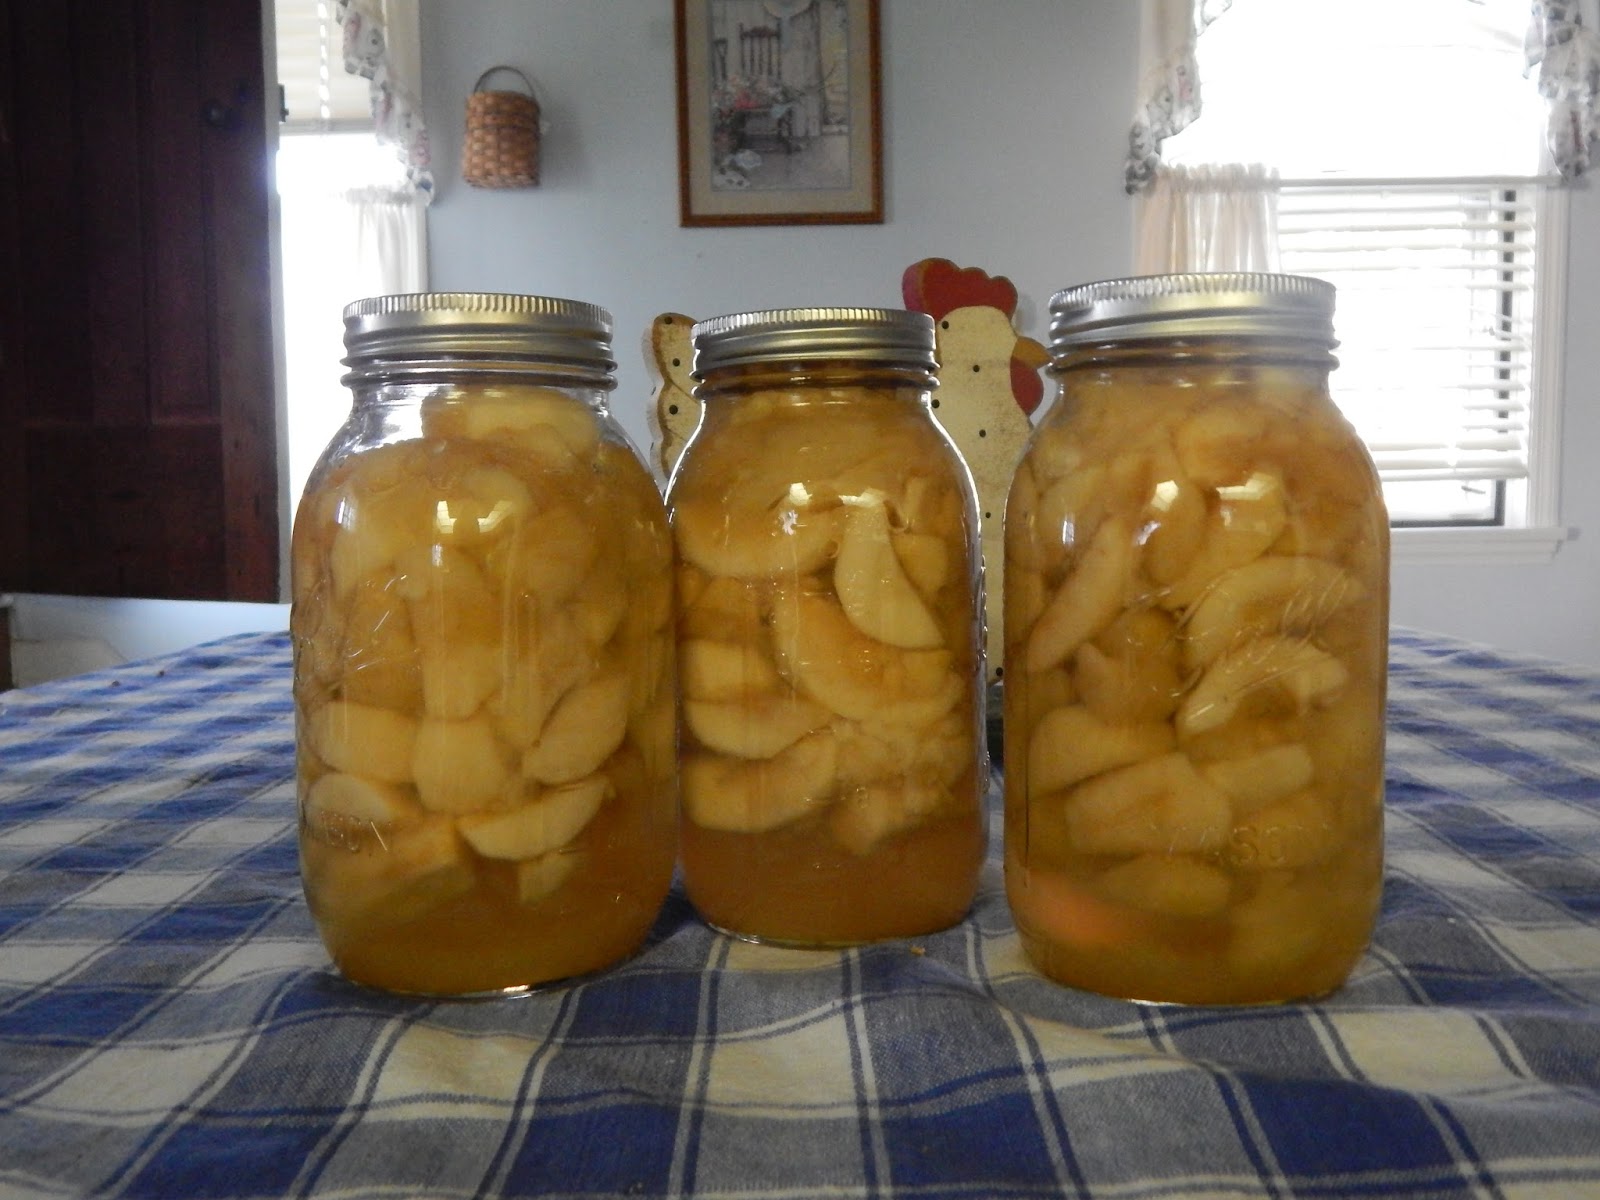
In the last post I mentioned picking a giant bushel of apples.  What did I do with those apples, you may ask?  Well, truth be told, we ate most of them fresh.  My kids can pack away fresh apples like nobody's business.  BUT, I did can some.  That's right.   I canned them.  Good old fashioned Mason Jar type food preservation.  You can can too.   Little play on words there...anywho, on to the tutorial!

There are really two big rules in home canning.  1. Plan before you can and 2. When in doubt, throw it out.  Keep those two things in mind and you will do just fine. 


Apples are an easy starter food to get your foot in the door to home canning.   They are fairly acidic so they can be canned using a waterbath canner instead of a pressure cooker, they generally hold up well to processing and they are versatile.  

Step 1 in the canning process is gathering your supplies.  You will need:
  • Several sterilized quart sized mason jars with new lids and neck bands
  • A peeler
  • An apple slicer  *this isn't "necessary" but it is helpful and makes the job go much faster
  • A waterbath canner
  • A jar lifting tool
  • A spatula 
  • A saucepan
  • About 30 apples (to get around 3 quart sized jars)
 Tip: keep the lids in a pot of simmering water until you are ready to use them. This softens the adhesive on the lids and makes for a better seal.

 Step 2:  Make your syrup.
  • You can choose to make either a medium or a light syrup.  If you are going to be mainly eating them straight from the jar, I personally like a medium syrup.  However, if you are going to be using them for applesauce or baking, then I prefer a light syrup.  In this case I used a light syrup.  For a light syrup I use 3 c. of sugar to 6 c. of water.  For a medium syrup I go with 4 c. of sugar to 6 c. of water.  Heat the sugar water to a boil over medium-high heat, stirring constantly until the sugar completely dissolves.  Reduce the heat to low to keep warm but don't allow it to boil down.  
Step 3: Prepare your apples
  •  Peel your apples and then core and slice them.  If you are worried about discoloration you can use citric acid or a fruit preserve powder, both of which you can find in your canning aisle at your grocery store.   Just follow the directions on the package.  Personally, I don't really worry about a little browning, that's me.  
Step 4: Packing the apples
  • Apples are a hot pack process.  That means that you cook the apples a bit before processing them in the jars.  Add your apples to the syrup and bring them both back to a soft boil at medium-high heat.  Boil gently for 5 minutes.  Pack the apples into the hot sterile jars using a slotted spoon, leave 1/2 inch head space (that part is important so check the chart below to see how to determine head space). Pour syrup of the apples, still leaving 1/2 inch of head space. Using your spatula, press the apples around in the jar to remove air bubbles.  Wipe down your jars, especially around the rim, center the lid and place the band.  Twist the band until just tight.

Step 5:  Process the jars.
  • Place your jars in the water bath canner and fill the canner with water 1 in. above the tops of the jars.  Process your jars in boiling water for the amount of time specified for your altitude.  Don't start timing until the water is actually boiling.  If you are at sea level, boil for 20 minutes.  Add 2 minutes for every 1000 feet above sea level.  So, for example, 1000 or less feet above sea level=20 minutes, 1001-2000ft above sea level=22 minutes, 2000-3000ft above sea level=24 minute and so on and so forth.
 Step 6: Allow your jars to cool
  • I sit my jars on a folded towel on the counter to minimize heat damage.  Allow them to sit for 24 hours.  You may begin to hear random pinging/popping noises...don't be alarmed, that's a good thing.  After 24 hours check your jars for a good seal.  If your jars have sealed properly the center of the lid will not move, or have any "give", when you press on it.  If all goes well, your newly canned jars of apples will last about 12 months, IF you can keep from eating them for that long!


Happy Fourth of July...

Ok, so I'm a day but I hope your Fourth of July was a good one.  For us, meh...  There was a light drizzle here so our tiny midwestern town decided it might melt if it held it's fireworks display so they postponed it for tonight.  Unfortunately, we didn't get the message and we packed up all the kids in our finest patriotic gear, grabbed the camera, grabbed a picnic basket and headed for the fairgrounds.  At least we didn't feel too dumb, there were several other people there who didn't get the message either.

We spent most of our Fourth of July morning and afternoon working out in the garden planting and weeding and weeding and planting and working on the old Ford tractor that hasn't been run in more than two years.   After hooking the chain up to it and pulling it with the truck around the barn once or twice we were able to get it started and it ran really well.  The only problem with is it refuses to start back up once it's shut down so obviously we need to work on the starter a bit more but just the fact that ol' reliable started up at all and ran for any length of time was a wonderful thing. 

The garden itself is doing pretty well.  In the little garden we've attempted a "mostly" no till approach.  The only tilling we have done has been in the planted rows themselves and, considering the small size of this particular garden space, that has only been about six rows all told.  I can honestly say I don't think I'll take a no till approach next year but the garden has grown, we do have celery, chinese lettuce, peppers, broccoli, tomatoes, watermelon and corn popping up.  We even have a musk melon coming up that we didn't even try for.

Our summer flowers are starting to bloom. 

We finally have our chicken coop MOSTLY finished and our girls have been in their new home for about a week now.  They seem to really enjoy it.  We still have a few odds and ends to work on like their window and cutting out the door to their outside pen area and adding a couple more perches but overall it's done.    It's a nice change from the small, portable coop we did have.  This one is secure in the barn and should, hopefully, be much nicer for winter.  The girls seem to really enjoy it.


I think the only one who doesn't like the new coop is Miney the barn cat
He can watch the chickens in their new space but can't get at them, which he's just not real happy about.  :) 

Homemade Biscuit Mix

Food costs have been steadily increasing for the last several years and are expected to continue to go up, up and away.  With more and more families finding that their grocery bills are increasing $100, $200, sometimes even $300 a month without buying any more than they used too, many people are scrambling for ways to cut food costs.   Making at home and making in bulk is one way to do just that. 

A family of four will, on average, spend about $700-$900 a month on groceries.  A family of 6 will spend an average of $1,200 to $1,500 a month.   By homesteading (raising our own, growing our own, making our own, canning our own, and freezing our own) our family of five, soon to be six, spends an average of only $200 a month on groceries.  $1,000 to $1,300 less a month than most other families our size.  That's not including the costs we save on other items we make ourselves like soaps, detergents, clothes, even some furniture.  Even small steps towards a more self-sufficient lifestyle can be well worth it.  

So what's the homesteading tip for today?   Making your own biscuit mix!  Replace store bought mixes like Bisquick and Jiffy for a much more economical homemade mix.  The recipe I use makes biscuits, pancakes, waffles, muffins, some breads, cake and more all from one convenient mix that takes only a few minutes to prepare. 

What you'll need:
1. A large bowl
2. An air-tight container
3. All-purpose flour
4. Sugar
5. Non-fat, dry milk
6. Salt
7. Baking powder
8. Vegetable shortening
9. Sifter
10. A food processor or pastry cutter

The mix:
 Sift 6 cups of flour, 1 cup non-fat dry milk, 1/2 cup sugar, 1/4 cup baking powder, and 2 t. salt into the large bowl and stir to mix.


 Add 3/4 cup shortening and either grind in a food processor (my preferred way) or cut in with a pastry cutter until mixture looks like coarse crumbs.

 That's it.  Store it in an airtight container at room temperature or, even better yet, in the fridge for as long as it takes you to use it.  Simple. 


Some things make with it:

Biscuits:
Preheat oven to 425°.
Mix 2 c. biscuit mix with 1/2 c. water.  Stir well.  Turn onto floured surface and knead just a few times.  Roll or pat to desired thickness (I generally use about 1/2 in.)  and cut with a biscuit cutter or lightly floured glass.   Bake on an ungreased cookie sheet 12-14 minutes or until lightly browned. 

Pancakes:
1 c. biscuit mix
1/2-2/3 c. water
1 egg
1 T. vegetable oil

Beat together egg and water.  Stir together egg/water mixture, biscuit mix and oil just until moistened.  Cook on a hot griddle.   Makes 18 3-inch pancakes. 

Waffles:
2 c. biscuit mix
2 eggs
2 T. vegetable oil
1 1/4 c. water

Mix the same as for pancakes.  Cook in hot waffle iron.

Oat Muffins:
1 c. biscuit mix
1/2 c. rolled oats
2 T. sugar
1/3 c. raisins
1 egg, beaten
1/2 c. water
2 T. melted butter, margarine or vegetable oil

Preheat oven to 350°.  Combine dry ingredients and raisins in a bowl.  Combine egg, water, and oil in another bowl and then stir into dry ingredients until just moistened.  Spoon into 6 well-greased muffin cups.  Bake for about 25 minutes.  Makes 6 large muffins.

Raisin Cinnamon Bread:
3 c. biscuit mix
1/4 c. sugar
1 1/2 t. cinnamon
2 t. grated lemon rind
1 1/4 c. raisins
1 egg
1 c. water
2 T. melted butter, margarine or vegetable oil

Preheat oven to 325°.  Combine biscuit mix, sugar, cinnamon, lemon rind and raisins in a bowl.  Combine egg, water and butter and stir into dry ingredients.  Beat on medium speed for 30 seconds.   Turn into well greased 9" x 5" loaf pan.  Bake for about 1 hour and 15 minutes or until a toothpick comes out clean.  Turn onto a rack to cool. 

Quick and easy cake:
1 1/3 c. biscuit mix
3/4 c. sugar
1 egg
1/2 c. water
1 1/2 t. vanilla

Preheat oven to 350°. Combine dry ingredients in a bowl.  Combine egg, water and vanilla.  Stir 1/2 of liquid mixture into dry ingredients; beat on medium speed for 1 minute.  Stir in rest of liquid mixture and beat 1 minute longer.  Turn into greased and floured 8 in. cake pan.  Bake for 25 minutes or until done.  Allow to cool before frosting. 

Quick and Easy Baby Sweater

One of the projects I had started for the holidays was the Quick and Easy Newborn Sweater.  I found the pattern on Ravelry, of course.

.  I really liked the garter texture on this pattern, it's something a bit different.  But I think if I try it again at a later date I'll probably modify it to be in stockinette stitch and maybe add some duplicate stitch designs for variety.   The only other problem I've found with the pattern is that I really think it's going to be a bit too large for a newborn.  My guess is it will probably fit the 3 month crowd a bit better than a newborn.

I'm excited for the next project even though I haven't completely decided what I'll be doing yet.  I think that the next one will likely be a baby blanket, I just don't know which pattern I'm going to work up yet.  I still have The Afghan from Hell to finish, just the fringe, but my yarn for it is out in the crib/workshop and there is seriously about 4 ft. worth of snow drifts blocking me from it.  I would like to get that finally finished and out of the way though.  That thing has been mocking me since I started it, not necessarily because it's difficult but simply because it's TEDIOUS. 

My mother in-law has an afghan she wants me to start on once I'm finished with The Afghan from Hell so hopefully I'll be able to make it out to the workshop in a couple of days to collect the yarn and finish it so I can start on her project.   The afghan she wants done is going to be a bit of a challenge because it was already partially started by DH's grandmother before she passed but there is no pattern.  Therefore, I'm going to have to figure out the pattern and gauge before I can really get any amount of meaningful progress done on that blanket. Fortunately, I don't think the pattern is overly difficult and I think, once it's figured out, it should work up pretty quickly.

Granola Bars Episode 1

Tis the season for snacking, apparently.  My trio of munchkins have been craving snacks for the last several days and so I've taken to the kitchen to save the day with homemade granola bars.

Now if there was ever an easy and versatile food to make this one is it.   The recipe is simple and it takes no time at all to cook and cool.   The combinations you can create are almost endless and you can even experiment with texture.   We have our family favorites including cranberry chocolate chip, cinnamon honey peach, peanut butter chocolate chip, dark chocolate chip (we're a chocolate loving family),  strawberry banana, and plain ol' raisin granola bars.   We also tend to like our granola bars thick and chewy as opposed to thin and crispy.

This time around I went for the cranberry chocolate chip granola bars.   The tart cranberry and the dark chocolate go together really nicely.

The recipe I use is incredibly simple and uses really easy to find ingredients.

3 c. whole grain, old fashioned oats

1 can (14 oz.) sweetened condensed milk

2 Tblsp. unsalted butter, melted

1/3 c. flax meal (optional)

1 c. dried cranberries

1 c. dark chocolate chips

Preheat the oven to 350°.   Mix the oats, condensed milk, butter, flax meal, cranberries and chocolate chips in a large bowl until everything is blended together well.  Press the mixture into a greased 9x13in. pan.  Then bake for 20 to 25 minutes depending on desired level of crunchiness.  Allow to cool before cutting and serving.  These will keep really well for about two weeks if stored in an airtight container.  Because of the condensed milk, you really wouldn't want to store them much longer than that without refrigerating or freezing. 


Because the Laundry Won't Do Itself...

Today was laundry detergent making day at our house.  I make a powdered detergent.  The process is quick and painless, taking me only a couple of minutes to make up the batch.  This simple, homemade detergent gets our heavily soiled, farm-family laundry clean with only about 2 Tblsp. per load.

What you'll need:
1 c. of Borax
1 c. of Super Washing Soda (you can usually find this at the larger grocery stores like Meijer or Walmart near the Borax.  If you don't find it there you can sometimes get it at swimming pool supply stores or you can get it online at Amazon)
1 bar of soap like Fels Naptha, Zote or Ivory
1 grater (I recommend keeping one separate just for this purpose)
1 airtight container (we use an old coffee can with a tight fitting lid)

That's Arm and Hammer's Super Washing Soda in the picture, don't confuse it with baking soda. They are not the same thing.

Once you've gathered your supplies there are all of four steps left to homemade laundry detergent.  Step 1: Grate your soap.  Step 2: Add your washing soda.  Step 3: Add your Borax.  Step 4: Replace lid and shake it up, baby!   There is an optional step 5: You can add a few drops of essential fragrance oil if you like.  I use a "fresh linen" scented fragrance oil on occasion but you can add any scent you'd like. 

The cost of making my own detergent breaks down like this:
The Borax costs me $3.29 for a 76oz. box= $0.34 per batch
The Super Washing Soda costs the same, $3.29, for a 55oz. box=$0.48 per batch
A three pack of Ivory soap costs $1.69.=$0.56 per batch

The grand total there ends up being about $1.38 for a batch.  I use the full 2 Tbsp. per load and get about 32 loads of laundry out of one batch detergent.  That puts me in at a crazy $0.04 per load of laundry! 
Compare that to the Dynamo I used to buy before I started to make my own.  For a 32 load bottle of Dynamo, I would normally pay about $9.87 at the grocery store.  That's already $8.49 more than for the same number of loads with my homemade detergent.  With the Dynamo the cost per load of laundry was about $0.31, more than six times the cost per load with the homemade detergent!
If I add the extra cost of essential fragrance oil to the mix I end up with a cost of about $1.47 per batch and still around $0.04 to $0.05 per load of laundry.  No matter how you slice it, I'm saving a considerable amount of money for a small amount of effort.  Definitely worth it.

Artisan Sourdough Bread and Crochet Sandwhiches

Our Random Acts of Kindness experiment has gone really well.  The kids have really enjoyed getting involved, which is great.  Some of our random acts included cheering on the walkers for the Multiple Sclerosis relay, baking treats for shelter animals and our own furry friends, writing get-well-soon letters to the grandfather of one of Oldest's friends, and picking up trash at the nature center while we hiked.   When we started I thought 30 days would be hard to accomplish but now that we are almost to the end of our month long RAK, it seems like it all went pretty quickly.  Hopefully we have developed some "kindness habits" that will stick around for awhile.

I had mentioned in a previous post (although I don't remember which one) that I was knitting and crocheting play food for the kids to use in their toy kitchen.   Well, I finally got around to taking pictures of the sandwiches I made for them.
Peanut Butter and Jelly. 

 
 The jelly in the picture came out looking a little blue but in reality it's purple (grape).


Sandwich number 2.


This is the ham, roast beef, cheese, lettuce, tomato and pickle sandwich.


The bread and peanut butter and jelly pattern came from craft frog.  The ham and tomatoes I found on the lion brand website (free membership required).  The roast beef was my own adaptation of the knit ham from lion brand. However, instead of knitting in stockinette, I knitted it in garter stitch.  The lettuce pattern comes from the hook, yarn and needles blog.  The pickles were my own creation.  A simple crochet in the round pattern with single crochet stitches.  It took me a weekend to make and the kids LOVE it.  


I've also been baking more bread.  Making bread and noodles seems to be the majority of my time spent in the kitchen these days.  Recently I tried my hand at artisan sourdough bread.  


I really like the process of making the artisan style loaf, which is totally different than the traditional loaf I usually make.   There were fewer steps with this loaf of bread than the traditional loaves.  No kneading was necessary and it only had to rise once.   I appreciated that fact tremendously.  However, I've learned from this experience that I'm not a big fan of sourdough bread.  I do not like it Sam-I-Am and neither do the kids.  Hubbs thoroughly enjoyed it though.  He ate half the loaf on his own the first day.  He ate the other half the second day.  So for his sake alone, I'll be making it again some time.  For the rest of us, maybe I'll try a rustic white bread next time.  I think the sourdough flavor was just a little too robust for my liking. 

I'm Jumping In

I've decided to go ahead and join the declutter challenge mentioned in my previous post.  If anybody else wants to join in go ahead to Hoof 'n Barrel where I heard about it first or head directly over to the Single Saver blog.  
Around here we have a donation truck that stops by every so often where you can donate items to various causes (veterans, lupus, or the kidney foundation).  You place a bag of items out by your front door, mailbox, garage door or whatever and some time during the scheduled pick up day they come and whisk the bag away leaving you a brand new bag and a thank you  note. Since the goal is to donate 366 items in one year, I'm aiming for 1 item per day.  Which meant that when the truck pulled up to my house this morning I intended to have at least 8 items to give away to the truck.  In my house, 8 items really weren't hard to find and I easily met my goal.  Yay for progress! 

While I'm saving my sanity by clearing some of the clutter in my house I decided to also try to save what's left of my old, worn out furniture and crochet some coasters for the coffee table and end tables.


The picture came out a little dark but I'm to lazy today to try and fix it in photoshop.  You'll just have to imagine it a little brighter.

I had previously thought of buying new coasters until I found out that a set of four, simple, cork coasters cost around $7.50.   Needless to say I was a little appalled by that.  I'm not really a cheapskate or anything but, yeah, there was no way I was going to spend that much money for a few chunks of cork board.  I decided to crochet the coasters instead of simply cutting out cork board circles because I thought it would be a lot prettier and it was a way to use some some of my spare cotton yarn. 

I used regular old Lily Sugar and Cream Cotton yarn in ecru and warm brown.  As I mentioned, I used scrap that I had laying around but I priced them at my local Meijer and brand new they only cost about $1.79 for a 2 oz. skein.  I got 4 coasters and a matching dishcloth out of about 3/4 of a single skein of yarn.  SO, I got all of that for less than $2 and far less than the $7.50 for a new set of store bought coasters.  It pays to make your own.  There are alot of free patterns in the world for crochet coasters so I won't bother typing this one out here.  The basics are just a simple crochet circle to the size you want and then I added a very easy picot edge.  Easy-peasy-lemon-squeezy. 

Cinnamon Swirl Bread


I made this cinnamon swirl bread for my father-in-law who really didn't believe that I knew how to make bread without a bread machine. He absolutely loved it though!   I ended up making four loaves, two for my in-laws and two for us.  The recipe is a basic egg based white bread except, instead of shaping it into loaves, you roll each divided half of dough into a 15x7" rectangle and sprinkle each with half a mixture of 1/2c. white sugar and 2 tsp. cinnamon. Then roll it jelly roll style, pinch the seams and place them, seam side down, into two greased 9x5x3 loaf pans.  I glazed one loaf with a basic powdered sugar icing and left the other plain.  We actually like it better without the icing. 

Egg based white bread is the only kind of bread my grandmother would make but darn is it good! Egg based dough makes a bread with a softer crust and there is a bit more firmness to the loaf, it doesn't smoosh as easily as basic bread dough.  It also ends up with a richer flavor and a slightly yellow tint to it.  I usually only make one loaf into the cinnamon swirl bread and make the other into plain white bread because it saves me from having to make another two batches of bread dough for things like sandwiches, french toast, etc.

Banana Bread

Hopefully everyone had a wonderful Thanksgiving!  Our turkey day was pretty standard.  We had food and football, both in very large quantities.  I was in a food comma for most of yesterday and didn't manage to get much done except a little cleaning from Thursday's festivities and I turned some of our over-ripe bananas into banana bread with vanilla frosting. 

I used a different recipe than normal, a much less complicated recipe than normal, and it turned out really good.  I found the recipe for the banana bread on cooks.com.  The only change I made to the recipe was that I added a little bit of cinnamon.  Next time I may add some chocolate chips for the kids or you could add nuts if you prefer it that way. 

The vanilla frosting is just a basic vanilla frosting recipe.  Nothing fancy.  Very simple.  The recipe that I used for the frosting came from my one and only brain but you can find a very similar recipe on food.com.

The frosting recipe is basic enough that you can substitute the vanilla for almost any flavoring that interests you. Make sure to sift the powdered sugar first.  If you find that the frosting is a little too thick  just add a bit more milk and stir awhile longer and it should be fine.

This is a really good way to use up those bananas that are too ripe to eat anymore and kids love it.  Well, at least my kids love it but my kids are such ridiculously picky eaters that if they will eat it then that's a pretty good bet that almost any kid will eat it.

Cake Flour vs. Bread Flour

Ever wonder if what type of flour you use really matters? 

The above loaf of bread  was accidentally made with cake flour.  See, I buy my flour in bulk and keep it in the bags in a metal trash can (clean, of course) with a tight fitting lid.  When it was time to make bread this week I figured that I had plenty of flour in the can and I was right.  I still had at least half of a 50lb bag.  Without looking at the label I reached in and filled my flour canister and went about making the bread.  It wasn't until the first rising stage that I got a notion something may be wrong but I figured it was just not quite warm enough in the house since it is fall and it had risen some so I figured we'd just make do with a slightly more dense than normal loaf. 

Turns out it wasn't the loaf that was dense.  It was me.  When I pulled it out of the oven, instead of a nice, normal, slightly browned, light and fluffy loaf of bread I got that white rock in the picture. I had completely forgotten that I had cake flour at all and had just assumed that the flour I had grabbed was either the all purpose flour or the bread flour either or which would have been fine.  These loaves didn't just look terrible, they tasted terrible.  The only ones who would eat them were the dogs and I don't think they were really thrilled with it.

Now, after spending nearly 3 hours making bread the last thing I wanted to do was have to start all over but that's what I get for not being diligent in the first place. With the second set of loaves I made sure I had bread flour not cake flour. 
Now, this is what bread should look like (ignoring the poor quality of the image, of course).  Brown, not white.  Fluffy, not rock hard.  Nice loaf shape, not whatever that other thing was.  So now we all know that the flour you use makes a definite difference.

Popcorn!

My Father-in-law grew an acre or so of popcorn this year and had brought over about 40 ears for us to sell at our little stand.  Fortunately for us, they didn't sell!  For the life of me I can't imagine why it didn't sell other than perhaps most people didn't know what it was and didn't realize that after they decorated with it they could eat it.  I mean, this is useful stuff, it's not like normal purely ornamental indian corn. Oh well, it meant more for us.

Most people don't believe me when I tell them that there really is a difference in taste between homegrown, home dried, pan popped popcorn and the popcorn that you get in a little paper bag and stuff in the microwave, at least until they try it.  Microwave popcorn needs the butter it's slathered in and the mounds of salt covering it.  Without it, it tastes pretty terrible.  Pan popped popcorn tastes great with just a little shake of salt and nothing else.

We dried our popcorn in a cool dry spot in our garage for about two weeks before I even bothered to pop a few test kernels.


Despite the fact that a small mouse  or other critter had managed to sneak a few bites during that time the drying was successful and the test kernels popped just as they were supposed to.  So we took half of the cobs inside to hull them.

The kids usually get the job of hulling the popcorn and it's one of the chores that they actually enjoy.  They made pretty quick work of the first 20 ears that they worked up.  We'll save the next 20 for tomorrow or the next day. Ordinarily, after you've hulled the popcorn you can simply stick what you don't want pop right away into freezer bags and freeze them for up to 30 months.  However, since hulling is done by the children in my house, I find that I have to wash the kernels after they are done hulling because we usually end up with excessive amounts of cob pieces, hairs, and general debris.  When it's in small amounts it's no problem but when the debris covers the kernels in their bowls it becomes more of an issue.

The nice thing is that dry corn kernels sink while dirt and debris tends to float.  So, I simply immerse the corn kernels in a large bowl full of warm water and then fish the debris out with a mesh ladle strainer.  If you find you need to do this then try to make quick work of it.  Soaking the kernels for a few minutes won't hurt anything but you don't want them to soak for hours.  After I'm done washing them I stick them on cooking sheets in single layers and put them in the oven at 170 degrees (the lowest my oven will go) for about an hour or hour and a half to dry. 

I popped up a batch for my brother-in-law and his girlfriend since they had come for a visit.  His girlfriend had never seen anyone pop popcorn in a pan on the stove before, which really surprised me.  It got me thinking that maybe popping popcorn on the stove is becoming a lost art, perhaps there are many people out there who don't know how to do this.  So I'll run down the process on here. 

Popping Popcorn on the stove:

1. Get a sauce pan with a well fitting lid.  I use one with a glass lid so my kids can watch the kernels pop, it's like nature's best magic trick.  It seriously entertains them almost as well as Saturday morning cartoons.

2. Pour in enough oil to coat the bottom of the pan.  It doesn't have to be a lot of oil, a small amount will do as long as it completely covers the bottom of the pan.

3. Turn the heat on medium-high.

4. When the oil has had a little time to heat up throw in a couple of test kernels.  If they pop (usually takes just a few seconds) then you know that the oil is hot enough to add the rest of the kernels.  If they turn brown immediately or scorch then you know the oil is obviously way to hot.  If it takes them forever to pop then you either don't have the oil hot enough or your popcorn is a dud.

5. Pour in just enough popcorn to cover the bottom of the pan in a single layer.  If you pour in more than a single layer on the bottom, the kernels underneath are more likely to burn and the kernels on top are more likely to not pop. 

6. Move the pan from side to side regularly to coat the kernels that haven't popped with the oil and to help keep the ones that have popped from burning.

7. The kernels will start popping at a furious pace and then, after several seconds the popping will start to slow down. At this point, take the pan off of the heat, wait another couple of seconds for the holdouts to pop, then CAREFULLY remove the lid because there will probably be a lot of steam.

8. Pour your popcorn into a bowl and dress it up however you want.  Obviously you can use salt or melted butter or both.  My husband actually likes to eat his with Zatarain's Creole Seasoning or seasoned salt.  I've also heard of people using powdered cheese, cinnamon sugar, regular sugar, caramel, a little powdered cocoa mixed with sugar, even a little Tabasco sauce (that last one is a little too adventurous for my blood).  The possibilities for toppings are endless really.  Once your done dressing up your popcorn, dig in and enjoy it. 

P.S. No, the popcorn in this picture is not burnt.  The darker hull on the popcorn is simply due to the multiple different colors of the original kernels.

I FINALLY Got My Camera Back!

After many, many, many loong weeks of not having a camera, I have finally gotten a new one.  Well, it's not exactly new.  I just managed to save enough money to fix up an old one.  The picture quality isn't great (as you'll see soon enough) but at least it's something.  Who knows, maybe Santa's elves have something in the works for me for Christmas.  

The last couple of months here have been pretty busy, mostly with the usual seasonal stuff like putting up corn and freezing and canning fruit from the fruit trees and vegetables from the garden.  In fact, both of our freezers are so full of corn, peaches and cherries that I'm having extreme troubles getting to the meat that is tucked back there someplace. 

Freezer number 1 has been housing all of our corn.  I think we put up somewhere around 40 bags of corn.  As you can see it's not entirely full at the moment. The partial clearing is thanks to the fact that we have been eating corn 4 days out of the week for the last 4 weeks.  We're all so sick of corn at this point that we're starting to have nightmares about it.  I think we'll have to take a couple weeks off from corn fritters, creamed corn, baked corn casserole, buttered corn, etc. etc. etc.

Freezer number 2 is completely filled mostly with peaches and cherries along with some small amounts of pumpkin, apple pie filling, strawberries, and the occasional pack of hamburger.  We currently cannot use freezer number 2 until I can clear out some of this fruit!  Now we LOVE fruit in my house but we all seem to be getting bored with the same peach muffins, cherry cobblers and various pies.  So, I've been on the hunt for new and versatile recipes that will help dwindle down some of our surplus.  One of our favorites so far is Cherry Coffee Cake which you can make with really any kind of fruit filling including peaches and apples. 

I personally found the recipe written out on an old recipe card and I have absolutely no idea anymore which cookbook it came out of but, here it is, in case you want to try it.  I completely recommend trying it, it's good.

Cherry Coffee Cake

1 egg, beaten
1/4 c. milk
1/2 c. sugar
1/8 t. salt
1/2 t. vanilla extract
1-3/4 c. biscuit mix (I make my own but you could use Jiffy or Bisquik too), divided
21-oz can of cherry pie filling (I made my own cherry pie filling using a quart size bag of frozen cherries).
1/2 c. brown sugar packed
1/2 t. cinnamon
3 T. butter, diced
1/2 c. chopped walnuts (optional)

Combine egg, milk, sugar, salt, vanilla and 1-1/2 cups baking mix.  Stir until smooth.  Pour mixture into a lightly greased 8"X8" baking pan.  Spoon pie filling over mixture in pan.  Mix together remaining baking mix, brown sugar, cinnamon, butter and nuts (if desired).  Sprinkle over pie filling.  Bake at 375 degrees for 40 minutes.  Cut into squares.  Makes 6 to 8 servings.

Egg Noodles

Our rock candy suckers are coming along nicely, although they aren't quite done yet due to the humidity and other factors that slowed our rate of evaporation down around here the last week.  BUT, they are forming and in another few days we should be able to eat them, which is clearly the best part!

Now,  I have a message for all those out there who buy over processed, neatly packaged egg noodles at the grocery store.  STOP!   That's right, stop it.  Just say no.  Sure the so-called egg noodles that you buy in the store are edible and they come already dried but seriously they aren't nearly as tasty as homemade noodles and most of the time they don't even have eggs in them.  Instead they contain ingredients that are barely pronounceable like thiamine monoitrate. 

Homemade egg noodles are EASY to make.  That's right, e-a-s-y.  They are inexpensive.  They are quick to make.  It will take you more time to drive to the grocery store and fight your way past the crowd in the pasta aisle to pick up the store bought, chemistry lab by-products that we call noodles than it will take you to make your own at home with ingredients you likely already have on hand and can definitely pronounce.   If you are thinking about dipping your toes into the water of a more free and self-sustained lifestyle than there is no better place to start than right here. 

There are several different recipes for homemade egg noodles.  Some call for water, some for milk, some for chicken broth and all of them are great.  Personally, though, I like my simple recipe best. 

  1. 1 cup of flour
  2. 1 t. salt
  3. 2 eggs
This recipe will make enough noodles for two people.  I usually triple it and then store it in bulk for my slightly larger than average family.  Feel free to increase the size to whatever is right for you and yours, just make sure to keep the ratios the same. 

Step 1.  Combine the flour and salt in a mixing bowl.
Step 2. Make a well in the center of the flour.
Step 3. Crack both eggs into the well and beat them up.  You could beat the eggs separately and then pour them into the well if you don't mind adding an extra dish to wash. 
Step 4. Gradually mix the flour from the sides of the well into the eggs.  Eventually you will get a nice ball of dough. 
Step 5. Turn out your dough onto a well floured surface.  Use your flour liberally on your hands, your surface and the ball of dough.
Step 6. Kneed the dough gently, adding flour as needed to keep the dough from sticking, until the ball is smooth and no longer sticky. Cover the ball in plastic wrap and place it in the fridge for at least 30 minutes or up to overnight.
Step 7.  Flour your rolling pin and surface and roll out your dough to whatever thickness you like from 1/4in. to paper thin, the choice is yours.  Then grab your pizza cutter (easiest) or butter knife and cut out long strips, try to stay as straight as possible. 

That's it.  You're done.  You've made noodles.  You can use them immediately or lay them out on a wire rack (faster) or dishtowel (slower) to dry completely.  Drying is usually the most time consuming aspect of noodle making and typically takes several hours . But once the noodles are completely dried you can store them in an airtight container on your shelf for up to 5 months. 

You may be looking at this last picture and wondering to yourself where all the noodles went.  Well, it's a sad story really.  You see, homemade egg noodles are not safe at my house.  They will sit there, minding their own business, trying to dry and my DH will come along and devour them one by one.  I try to protest on their behalf but my pleadings fall on deaf ears.  So I've had to resort to drying my noodles in batches.  One small batch that I keep on the counter in the kitchen, the sacrificial batch if you will, which DH spends all day picking at.  And the other batch, which I don't get out of the fridge to cut and dry until just before bedtime.  They are dry by the time I get up in the morning (usually just before DH gets up) and I can put them all away before he even notices that they were there at all.  I know it's pathetic but that's life when you are a married to an egg noodle addict. 

It's a Little Hot


90 degrees today at 2pm in the shade.  By the time the sun had set we had reached a peak temperature of 94 degrees with a heat index of 103 or 104 depending on who you ask.  But it gets better.  Tomorrow is supposed to be one of our hottest days on record, if not THE hottest day on record, with temps crawling at least to 95 and a heat index somewhere between 105 and 115.  Yep, you read that right, 115.  I think hell is about to swallow Ohio whole.

So what is one to do about the heat?  Well, for starters, we spent the day playing in the sprinklers.  Watering the critters.  Hosing the critters.  Hosing ourselves.  Sitting in the tub, kiddie pool, shower etc.  Eating chocolate dipped frozen strawberries, peaches, bananas and watermelon chunks and slaving over a hot stove.

"Wait, what!?  Did she just say 'slaving over a hot stove'?" 

Yes, yes I did.  Now you are probably thinking that I've gone all squirrely in this heat, perhaps I've lost my marbles.  Nope.  You see, there is one treat that I always associate with summer (and you really don't get much more "summer" than 95 degree searing heat).  It isn't ice cream or slushies or snow cones.  It's rock candy. 

Rock candy has a looong history dating at least back to 9th century India and Iran possibly even earlier than that!  It's been referenced by many authors and poets, including William Shakespeare.  In earlier times it was used for therapeutic purposes as medicine instead of simply as the sweet treat we know and love today.  For the life of me I have no idea why we ever stopped delivering our medicine via rock candy.  I mean, when I was a kid (probably even now as an adult) if my doctor had said "Here's your medicine" and then handed me a bag full of rock candy suckers, you better believe I would have spent much less time hiding under my bed and in closets to escape my mother and her medicine spoon.

None the less, it wasn't until about the 1700's that Rock Candy began to be widely used primarily as a sweet treat.  Rock candy is still more than a simple lollipop though.  It also makes for a darn tasty science project.  I use rock candy to teach my kids about crystals, solvents, solutes and solutions as well as evaporation.  

If you've never made rock candy before then now is the time.  It is relatively easy to do.  First, you need a few common kitchen items.


1. A couple of sterilized canning jars.
2. Some wax paper
3. A couple of rubber bands (or in our case hair ties)
4. 4 bamboo skewers with the sharp ends cut smooth.  You wouldn't want a little one to kabob their tongue.
5. A medium saucepan.
6. 1 cup of water
7. 3 cups of sugar (White or brown sugar. Either one works fine.)
8. Flavoring or food coloring if desired.  We used watermelon and grape.

The first step is to heat the water in the saucepan until simmering.  Heated solvents (water) can dissolve larger amounts of salutes (sugar) than they can when cold which makes it possible to super saturate the solution, a necessary step when making rock candy. 

Then stir in the three cups of sugar slowly, a couple of tablespoons at a time, stirring constantly and making sure that each batch of sugar dissolves completely before adding more. 

Once all the sugar is added you can stop stirring.  Allow the syrup solution to heat to a rolling boil. 

Once it reaches a rolling boil, remove it from the heat and dip your skewers in the solution. 
Place the skewers on a plate or on some wax paper and allow them to dry while you divide the solution evenly among your two canning jars.  Then add any flavoring or food coloring you want, making the solution just a bit darker than you want the finished product to be.

Place two skewers in each jar then cover with squares of wax paper, poking the paper over the top ends of the skewers.  Place a rubber band around the wax paper to keep it in place and set the jars up on the fridge or in any area that is out of direct sunlight and where the jars are unlikely to be disturbed.  DO NOT TOUCH THEM even though it's tempting.  The humidity in your area will determine how long it takes for the rock candy to form.  The less humidity there is is the faster the water will evaporate and therefore the faster the crystals will form.  You're probably wondering why it is, then, that we can't set these in direct sunlight as that should speed up the evaporation.  Well, that's correct.  It would speed up the evaporation...too much.  If the water evaporates too quickly then the sugar won't have a chance to form into those nice big crystals that become the rock candy. 


In 3 days to about a week we should have some rock candy suckers to show for our trouble.

Alas, it's finished!

I finished staining and hanging the first gourd birdhouse of the batch a couple of days ago.  I used an acrylic stain and finished it with about 4 coats to get it to the desired color.

The picture came out a little dark but you get the idea anyways.

Now I just have to finish Oldest's birdhouse that she's entering for the fair.  She decided what birds she wanted to attract and I cleaned, drilled and grinding the opening for her.  But I have to smooth it out a bit.  Then she's planning to paint it with her own design.  We still have a few weeks though, entries don't have to be in until near the end of July.  Hopefully we'll have enough time that if we screw up this one we'll be able to make another one in time to turn it in. :D


Cleaning the Inside of a Gourd

I've gotten the outsides of all of the gourds completely cleaned and scraped down and ready to go.  Last night I worked on the first birdhouse of the batch.  Now if you are going to make a birdhouse, bowl, jug, drum, etc. out of dried gourds (anything that requires large-ish open holes) you will need to clean the inside of the gourd as well as the outside.
The paper like stuff inside the hole is the pith.  It's usually moldy and gross. 

Not to sound redundant (in other words, yes I realize that I said this in the last post but it bears repeating) but you will need a dust mask of some kind...something more substantial than a bandanna or dew rag or t-shirt tied around your face.  I strongly suggest a full on respirator, I use one-P100 hot pink filters and everything.  At the very least you will need a dust mask made for filtering fine particulate matter. 

The other tools I use for cleaning the inside of a gourd are my trusty variable speed dremel tool with various sized grinding/sanding attachments (a drill and a hand saw or handheld jigsaw/router would work fine too).  I like the variable speed dremel because it cuts down on the amount of dust and offers better control.  I also use an old jigsaw blade, curved awl, and a thin wire brush.

For making a birdhouse the first step is to drill four small holes into the bottom of the gourd to help ensure proper drainage, it is a birdhouse after all not a birdbath. The next step is to determine where you want to place your opening.  I use a compass to draw a circle that is 1"-1 1/2" (the type of bird you want to attract will determine the size of hole you need to drill...check out a chart here) in diameter and use a pencil to mark the center of the circle. That's where you'll drill your starter hole. Then you need to drill two small holes into the handle of the gourd for your hanging wire, leather strips, strong string or whatever other sturdy material you'll use to hang your birdhouse.

I use the various grinders and sanders for creating the hole opening instead of a jigsaw or handsaw in part so that I can sand the hole opening while I'm making it...you know, killing two birds with one stone and all that...sorry for the poor choice of idiom but you get the point.  Anywho, once the opening is made it's time to clean out the inside of the gourd.  I use the old saw blade to break up the pith and the seeds and I shake out the loose material.  Then I use the awl and wire brush to loosen and grab whatever is left for a completely clean result.  Some people leave a bit of pith in the bottom to help the birds gain footing.  Personally the birds that come to my birdhouses never seem to have any trouble with footing without the pith and the one or two times I've left some in there the birds usually throw it right out anyways. Ultimately though the choice to pith or not to pith is really one of personal preference.

The inside of the gourd after it has been cleaned and the pith has been removed.

That's it, now the gourd is officially cleaned. After it's cleaned you can finish it off by painting or staining it and sealing it and it will last for decades. 
Finished (or nearly finished) product. Please ignore the extremely cluttered work table :)

I've Been Away for Awhile

It seems like it's been forever since I last posted on here but life has, once again, become very hectic.  This time it's because we are in the process of a move.  We're leaving our little homestead and heading for a much bigger one. 

It's gotten a little crazy, all of this was supposed to be finished at the beginning of April and here we are at the start of May and we're not entirely moved yet.  My husband's grandmother, who lives with us, has been having a very hard time with the move.  She doesn't care for change even on a small level so this big change in routine, lifestyle, etc. has been really scary for her.  So if anyone out there would be willing to pray for her, we would all greatly appreciate it.

The kids, on the other hand, are EXTREMELY excited. They can't wait to get to a bigger place with even more room to run and play than we have right now. The move was a definite necessity.  Since DH's grandmother has come to live with us space has been tight to say the least.  All three kids are crammed into one relatively small bedroom and Oldest is getting to the age where sharing a room with two boys is no longer something she tolerates well. We have only a small kitchen that is no longer functional for all the food prep (cleaning, cooking, canning, freezing, harvesting, drying etc.) that we do around here and storage is limited.  Living space is even worse with six to ten people usually spending the day crammed into the ridiculously small living room.  The lack of a basement in this house is also a big concern for DH considering the higher incidences of tornadoes and wicked storms that we've been experiencing as of late.  

Unfortunately I haven't been crafting much lately because I've packed most of my craft supplies and yarn and fabric away.  It's really starting to make me a little crazy, though.  I had no idea how dependent I was on "making things".  Clearly it's a sickness.


On a positive, and entirely unrelated note, Bin Laden has bit the big one!   We got him!  Woot!