"The greatest fine art of the future will be the making of a comfortable living from a small piece of land."
-Abraham Lincoln
Showing posts with label home making. Show all posts

Welcome 2014!

The new year has started off with a bang.  With the record breaking cold spells we've been having in the Midwest, most of our time so far this year has been spent trying to prepare for, survive through, and repair after the bitter arctic temperatures we keep experiencing.  You know you're in trouble when it's warmer in Alaska than it is in the lower 48 states. 

Cleaning the chicken coop and collecting eggs have become two of my least favorite chores, as the chicken coop is in the large barn clear at the other edge of the property from the house.  Walking out there in -40 degree wind chills has been no picnic.  We prepared the barn well for the first blast from the polar vortex by sealing up as many holes as we could find, shutting both of the large doors and putting up temporary windbreak walls made out of sheets of plywood wherever we felt necessary.  That prep has kept the chickens well and happy but, even with all of that, our eggs have not fared nearly as well.  We average a dozen eggs a day, even during the winter, and the last few weeks we've lost more than half of them to freeze. 

Still the ones that we manage to salvage are beautiful, large and extremely nutritious.  We've built quite a large client base around the area for our eggs.  We sell a little more than half of the six to seven dozen we bring in each week, not to shabby if I do say so myself.

The cold weather has taken it's toll on more than just our eggs.  We all have been getting cabin fever.  I've been grouchy, the kids are grouchy, the hubby is grouchy, heck even the dog is grouchy.  So to lift our blues away I decided to make one of our favorite treats, homemade fruit leather!  I went with an old standby of mixed berries, banana, half a lemon (for kick) and a drizzle of honey for added sweetness. 

The berries were ones that we had frozen from the spring and summer.  I used a mixture of rasberries, blueberries and wild strawberries.  The banana would have been a bit better if it had been a little more ripe, but, hey, you use what you have, you know? 

Anyways, put three cups of any mixture of berries that suits you into a medium sauce pan.  Add one whole banana and the juice from one half a lemon. Turn the heat to medium low and simmer until you get a nice berry, banana, lemon sauce going.  I simmered mine gently for about a half hour until it looked like this:

Let me just say that after about ten minutes of cooking these berries your entire kitchen is going to smell AMAZING!  

Now there are two schools of thought on the next step, those who strain and those who do not strain.  Either way is fine but if you choose not to strain it will take the fruit leather CONSIDERABLY longer to set up and "leatherize" in the oven.  I choose to strain the liquid at this point and it finishes for me in less than half the normal time.   

After simmering and straining, you place the mixture into a blender or food processor and blend it until it is smooth.  Then you spread it out as evenly as is humanly possible onto a cookie sheet lined with parchment paper.  You'll make your life much easier if you tape the parchment paper edges to the cookie sheet before hand, just a little tip.  

After smoothing it out, you'll place the cookie sheet into an oven preheated to the lowest setting possible, in my case that would be 170 degrees.  Leave the oven door open a bit and wait, and wait.....and wait.  At 170 degrees and after straining it took my fruit leather approximately 4 hours to set up.  With a lower temperature and/or omitting the straining you'll be looking at six to eight hours, approximately.  You'll know the fruit leather is finished when it is no longer sticky and no longer wet but still soft and pliable.  If it's brittle and cracking you cooked it too long so it's not a bad thing to check on it every hour or so.  

Once out of the oven you can invert take off the tape and invert it onto a clean cutting board.  At this point I trim up the parchment paper and cut the fruit leather into long, 1 inch wide strips.  Then I roll it and give it to the kiddos and the hubby.  If there is any left, and that's a big if, it goes in an airtight container in the fridge where it will keep for at least a week (that's the longest we've gone before eating it all).  

Now isn't that pretty?  And yummy too.  


Canning Apples

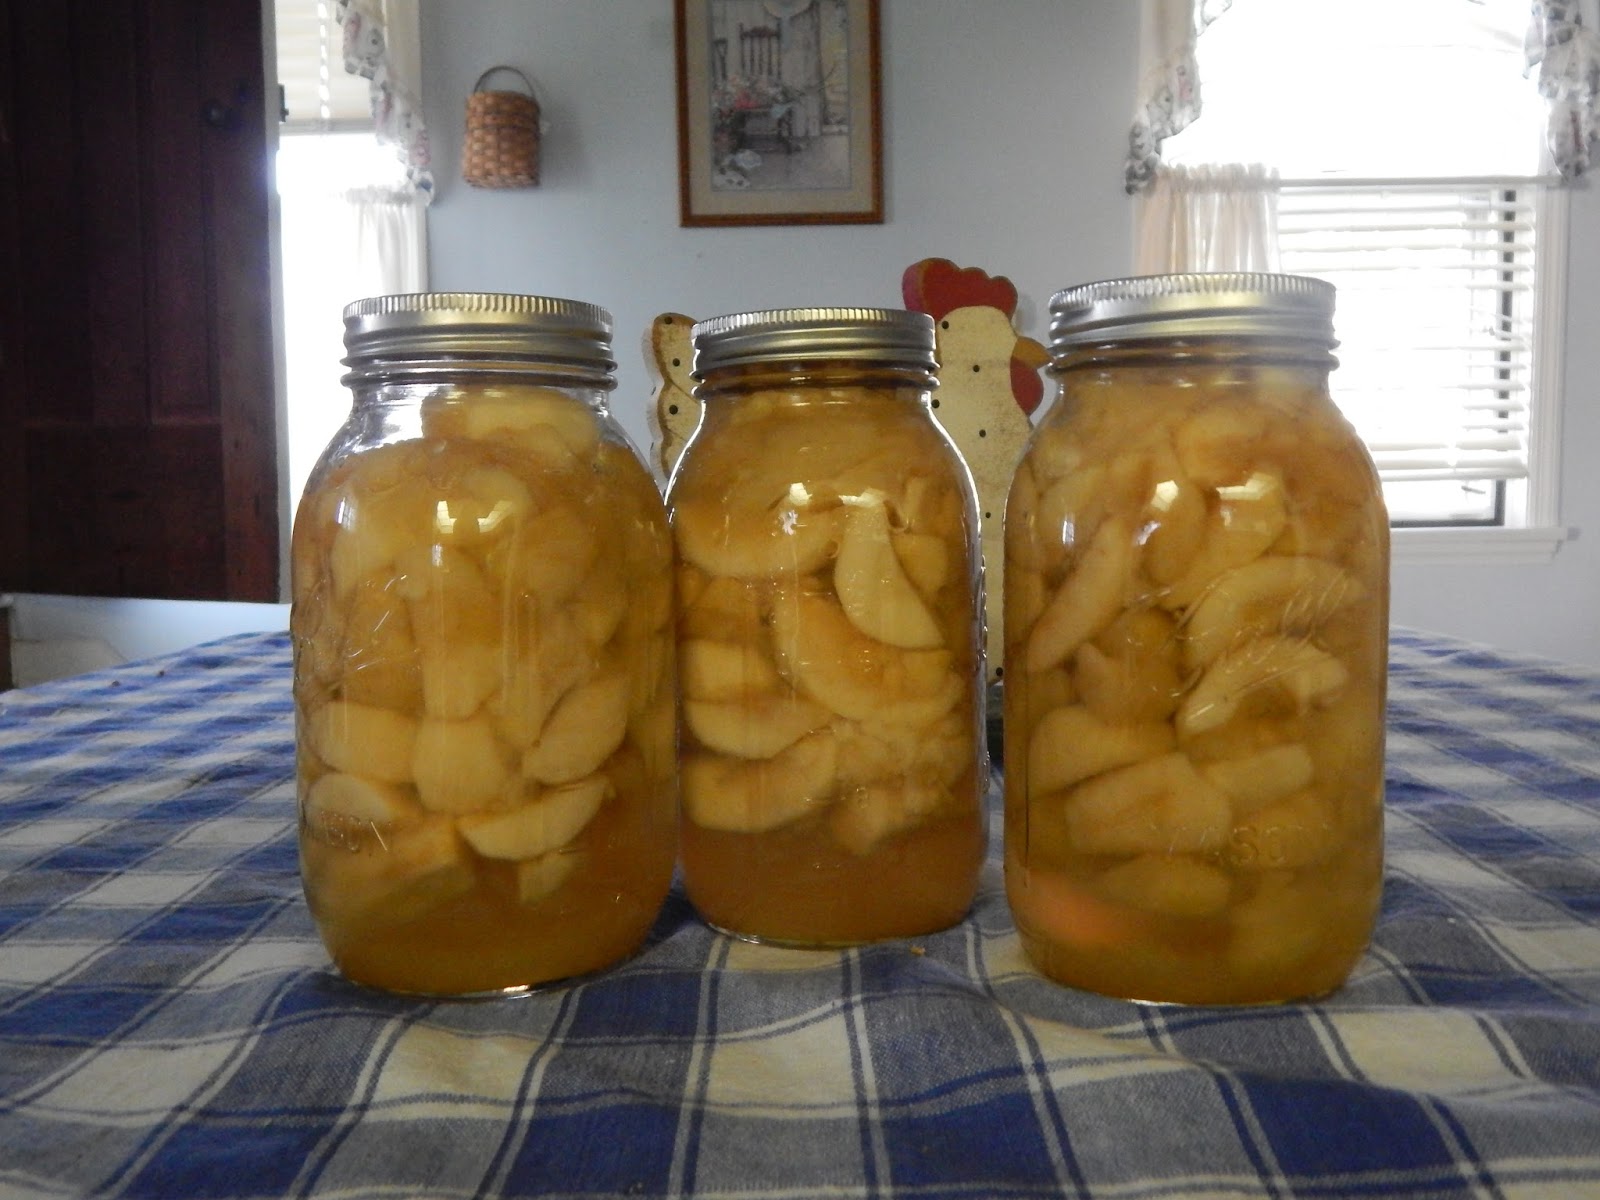
 My jars are sterilized and ready to go in the waterbath canner

In the last post I mentioned picking a giant bushel of apples.  What did I do with those apples, you may ask?  Well, truth be told, we ate most of them fresh.  My kids can pack away fresh apples like nobody's business.  BUT, I did can some.  That's right.   I canned them.  Good old fashioned Mason Jar type food preservation.  You can can too.   Little play on words there...anywho, on to the tutorial!

There are really two big rules in home canning.  1. Plan before you can and 2. When in doubt, throw it out.  Keep those two things in mind and you will do just fine. 


Apples are an easy starter food to get your foot in the door to home canning.   They are fairly acidic so they can be canned using a waterbath canner instead of a pressure cooker, they generally hold up well to processing and they are versatile.  

Step 1 in the canning process is gathering your supplies.  You will need:
  • Several sterilized quart sized mason jars with new lids and neck bands
  • A peeler
  • An apple slicer  *this isn't "necessary" but it is helpful and makes the job go much faster
  • A waterbath canner
  • A jar lifting tool
  • A spatula 
  • A saucepan
  • About 30 apples (to get around 3 quart sized jars)
 Tip: keep the lids in a pot of simmering water until you are ready to use them. This softens the adhesive on the lids and makes for a better seal.

 Step 2:  Make your syrup.
  • You can choose to make either a medium or a light syrup.  If you are going to be mainly eating them straight from the jar, I personally like a medium syrup.  However, if you are going to be using them for applesauce or baking, then I prefer a light syrup.  In this case I used a light syrup.  For a light syrup I use 3 c. of sugar to 6 c. of water.  For a medium syrup I go with 4 c. of sugar to 6 c. of water.  Heat the sugar water to a boil over medium-high heat, stirring constantly until the sugar completely dissolves.  Reduce the heat to low to keep warm but don't allow it to boil down.  
Step 3: Prepare your apples
  •  Peel your apples and then core and slice them.  If you are worried about discoloration you can use citric acid or a fruit preserve powder, both of which you can find in your canning aisle at your grocery store.   Just follow the directions on the package.  Personally, I don't really worry about a little browning, that's me.  
Step 4: Packing the apples
  • Apples are a hot pack process.  That means that you cook the apples a bit before processing them in the jars.  Add your apples to the syrup and bring them both back to a soft boil at medium-high heat.  Boil gently for 5 minutes.  Pack the apples into the hot sterile jars using a slotted spoon, leave 1/2 inch head space (that part is important so check the chart below to see how to determine head space). Pour syrup of the apples, still leaving 1/2 inch of head space. Using your spatula, press the apples around in the jar to remove air bubbles.  Wipe down your jars, especially around the rim, center the lid and place the band.  Twist the band until just tight.

Step 5:  Process the jars.
  • Place your jars in the water bath canner and fill the canner with water 1 in. above the tops of the jars.  Process your jars in boiling water for the amount of time specified for your altitude.  Don't start timing until the water is actually boiling.  If you are at sea level, boil for 20 minutes.  Add 2 minutes for every 1000 feet above sea level.  So, for example, 1000 or less feet above sea level=20 minutes, 1001-2000ft above sea level=22 minutes, 2000-3000ft above sea level=24 minute and so on and so forth.
 Step 6: Allow your jars to cool
  • I sit my jars on a folded towel on the counter to minimize heat damage.  Allow them to sit for 24 hours.  You may begin to hear random pinging/popping noises...don't be alarmed, that's a good thing.  After 24 hours check your jars for a good seal.  If your jars have sealed properly the center of the lid will not move, or have any "give", when you press on it.  If all goes well, your newly canned jars of apples will last about 12 months, IF you can keep from eating them for that long!


Granola Bars Episode 1

Tis the season for snacking, apparently.  My trio of munchkins have been craving snacks for the last several days and so I've taken to the kitchen to save the day with homemade granola bars.

Now if there was ever an easy and versatile food to make this one is it.   The recipe is simple and it takes no time at all to cook and cool.   The combinations you can create are almost endless and you can even experiment with texture.   We have our family favorites including cranberry chocolate chip, cinnamon honey peach, peanut butter chocolate chip, dark chocolate chip (we're a chocolate loving family),  strawberry banana, and plain ol' raisin granola bars.   We also tend to like our granola bars thick and chewy as opposed to thin and crispy.

This time around I went for the cranberry chocolate chip granola bars.   The tart cranberry and the dark chocolate go together really nicely.

The recipe I use is incredibly simple and uses really easy to find ingredients.

3 c. whole grain, old fashioned oats

1 can (14 oz.) sweetened condensed milk

2 Tblsp. unsalted butter, melted

1/3 c. flax meal (optional)

1 c. dried cranberries

1 c. dark chocolate chips

Preheat the oven to 350°.   Mix the oats, condensed milk, butter, flax meal, cranberries and chocolate chips in a large bowl until everything is blended together well.  Press the mixture into a greased 9x13in. pan.  Then bake for 20 to 25 minutes depending on desired level of crunchiness.  Allow to cool before cutting and serving.  These will keep really well for about two weeks if stored in an airtight container.  Because of the condensed milk, you really wouldn't want to store them much longer than that without refrigerating or freezing. 


Because the Laundry Won't Do Itself...

Today was laundry detergent making day at our house.  I make a powdered detergent.  The process is quick and painless, taking me only a couple of minutes to make up the batch.  This simple, homemade detergent gets our heavily soiled, farm-family laundry clean with only about 2 Tblsp. per load.

What you'll need:
1 c. of Borax
1 c. of Super Washing Soda (you can usually find this at the larger grocery stores like Meijer or Walmart near the Borax.  If you don't find it there you can sometimes get it at swimming pool supply stores or you can get it online at Amazon)
1 bar of soap like Fels Naptha, Zote or Ivory
1 grater (I recommend keeping one separate just for this purpose)
1 airtight container (we use an old coffee can with a tight fitting lid)

That's Arm and Hammer's Super Washing Soda in the picture, don't confuse it with baking soda. They are not the same thing.

Once you've gathered your supplies there are all of four steps left to homemade laundry detergent.  Step 1: Grate your soap.  Step 2: Add your washing soda.  Step 3: Add your Borax.  Step 4: Replace lid and shake it up, baby!   There is an optional step 5: You can add a few drops of essential fragrance oil if you like.  I use a "fresh linen" scented fragrance oil on occasion but you can add any scent you'd like. 

The cost of making my own detergent breaks down like this:
The Borax costs me $3.29 for a 76oz. box= $0.34 per batch
The Super Washing Soda costs the same, $3.29, for a 55oz. box=$0.48 per batch
A three pack of Ivory soap costs $1.69.=$0.56 per batch

The grand total there ends up being about $1.38 for a batch.  I use the full 2 Tbsp. per load and get about 32 loads of laundry out of one batch detergent.  That puts me in at a crazy $0.04 per load of laundry! 
Compare that to the Dynamo I used to buy before I started to make my own.  For a 32 load bottle of Dynamo, I would normally pay about $9.87 at the grocery store.  That's already $8.49 more than for the same number of loads with my homemade detergent.  With the Dynamo the cost per load of laundry was about $0.31, more than six times the cost per load with the homemade detergent!
If I add the extra cost of essential fragrance oil to the mix I end up with a cost of about $1.47 per batch and still around $0.04 to $0.05 per load of laundry.  No matter how you slice it, I'm saving a considerable amount of money for a small amount of effort.  Definitely worth it.

Declutter Challenge Update

I've been plugging along in my quest to declutter my house.  We've purged many useless, out dated, and outgrown items from our nooks and crannies and, as a result, I've found that I have all of this space that is housing stuff that actually belongs there, but is doing it in a very haphazardly sort of way.  I need a little organization so I've been on Pinterest finding inspiration.


Whether or not I'll ever get around to employing any of these ideas in my own home remains to be seen, but I thought they were pretty cute none the less and their associated websites have some pretty neat ideas for the home. 


The Doldrums

Around here we are definitely experiences a strong case of end-of-the-week doldrums.  The kids are feeling it.  The hubby is feeling it.  Even the dogs are feeling it.  So I thought,  "what better time to explore the jungle that I call my kitchen cabinets?"  No, that's not an exaggeration.  They are a complete mess.  Picture those closet avalanche scenes in any children's movie...that happens to me in my kitchen at least once a week. It really is insane.

Considering the clutter in my cabinets it's really no big surprise that there are items in them that I swear I have never seen before.  This cutting board, for instance, came as a complete surprise to me.

Just to show the world that I'm a complete dork, I fell in love with it.  Most people I know would probably find it really tacky.  I love tacky!  I'm serious.  If it's low-brow, backwoods, nerdy (I'm not talking Star Wars nerdy...I'm talking full-blown, Grandma-chic kind of  nerdy), cheap, country-bumpkin kind of stuff, I'm all over it.  Alright, it's out in the open now, I've officially come out of the closet and announced my shabby style to the world.  So, needless to say, this cutting board has received a place of honor on my kitchen wall.  It's faded, poorly drawn, and I'm pretty sure the chickens are up to something sketchy and those are some of it's best qualities in my eyes.  It has character. 

After sorting through about two cabinets I gave up and moved on to bigger and better things.  Things such as cleaning up some of our empty mason jars.

I have a friend who has never owned a Mason jar.  She actually seems to think they are some sort of impossible to find relic from somewhere around the Civil War era.  This amazes me since I seem to have these things coming out of my ears.  They are taking over my garage, my pantry, my life.  I think they're multiplying when I close the door.  I mean, it's ridiculous.  Now, don't get me wrong, I don't set out to hoard Mason jars.  Most of these came from Gran, or came with the house when we moved into hubby's great aunt's place, or they were snuck in bit by bit by my in-laws.   I've never bought a single Mason jar in my life.  They just seem to find me. 

After spending a full day of sorting through clutter in the garage and kitchen cabinets, and not getting rid of anything, I got online and at the top of my blog roll was a post from Hossboss over at Hoof'n Barrel talking about a declutter challenge and encouraging others to join along.  Divine providence?  Perhaps.  We may soon be seeing a new button on my sidebar. 

Cinnamon Swirl Bread


I made this cinnamon swirl bread for my father-in-law who really didn't believe that I knew how to make bread without a bread machine. He absolutely loved it though!   I ended up making four loaves, two for my in-laws and two for us.  The recipe is a basic egg based white bread except, instead of shaping it into loaves, you roll each divided half of dough into a 15x7" rectangle and sprinkle each with half a mixture of 1/2c. white sugar and 2 tsp. cinnamon. Then roll it jelly roll style, pinch the seams and place them, seam side down, into two greased 9x5x3 loaf pans.  I glazed one loaf with a basic powdered sugar icing and left the other plain.  We actually like it better without the icing. 

Egg based white bread is the only kind of bread my grandmother would make but darn is it good! Egg based dough makes a bread with a softer crust and there is a bit more firmness to the loaf, it doesn't smoosh as easily as basic bread dough.  It also ends up with a richer flavor and a slightly yellow tint to it.  I usually only make one loaf into the cinnamon swirl bread and make the other into plain white bread because it saves me from having to make another two batches of bread dough for things like sandwiches, french toast, etc.

Banana Bread

Hopefully everyone had a wonderful Thanksgiving!  Our turkey day was pretty standard.  We had food and football, both in very large quantities.  I was in a food comma for most of yesterday and didn't manage to get much done except a little cleaning from Thursday's festivities and I turned some of our over-ripe bananas into banana bread with vanilla frosting. 

I used a different recipe than normal, a much less complicated recipe than normal, and it turned out really good.  I found the recipe for the banana bread on cooks.com.  The only change I made to the recipe was that I added a little bit of cinnamon.  Next time I may add some chocolate chips for the kids or you could add nuts if you prefer it that way. 

The vanilla frosting is just a basic vanilla frosting recipe.  Nothing fancy.  Very simple.  The recipe that I used for the frosting came from my one and only brain but you can find a very similar recipe on food.com.

The frosting recipe is basic enough that you can substitute the vanilla for almost any flavoring that interests you. Make sure to sift the powdered sugar first.  If you find that the frosting is a little too thick  just add a bit more milk and stir awhile longer and it should be fine.

This is a really good way to use up those bananas that are too ripe to eat anymore and kids love it.  Well, at least my kids love it but my kids are such ridiculously picky eaters that if they will eat it then that's a pretty good bet that almost any kid will eat it.

It's a Little Hot


90 degrees today at 2pm in the shade.  By the time the sun had set we had reached a peak temperature of 94 degrees with a heat index of 103 or 104 depending on who you ask.  But it gets better.  Tomorrow is supposed to be one of our hottest days on record, if not THE hottest day on record, with temps crawling at least to 95 and a heat index somewhere between 105 and 115.  Yep, you read that right, 115.  I think hell is about to swallow Ohio whole.

So what is one to do about the heat?  Well, for starters, we spent the day playing in the sprinklers.  Watering the critters.  Hosing the critters.  Hosing ourselves.  Sitting in the tub, kiddie pool, shower etc.  Eating chocolate dipped frozen strawberries, peaches, bananas and watermelon chunks and slaving over a hot stove.

"Wait, what!?  Did she just say 'slaving over a hot stove'?" 

Yes, yes I did.  Now you are probably thinking that I've gone all squirrely in this heat, perhaps I've lost my marbles.  Nope.  You see, there is one treat that I always associate with summer (and you really don't get much more "summer" than 95 degree searing heat).  It isn't ice cream or slushies or snow cones.  It's rock candy. 

Rock candy has a looong history dating at least back to 9th century India and Iran possibly even earlier than that!  It's been referenced by many authors and poets, including William Shakespeare.  In earlier times it was used for therapeutic purposes as medicine instead of simply as the sweet treat we know and love today.  For the life of me I have no idea why we ever stopped delivering our medicine via rock candy.  I mean, when I was a kid (probably even now as an adult) if my doctor had said "Here's your medicine" and then handed me a bag full of rock candy suckers, you better believe I would have spent much less time hiding under my bed and in closets to escape my mother and her medicine spoon.

None the less, it wasn't until about the 1700's that Rock Candy began to be widely used primarily as a sweet treat.  Rock candy is still more than a simple lollipop though.  It also makes for a darn tasty science project.  I use rock candy to teach my kids about crystals, solvents, solutes and solutions as well as evaporation.  

If you've never made rock candy before then now is the time.  It is relatively easy to do.  First, you need a few common kitchen items.


1. A couple of sterilized canning jars.
2. Some wax paper
3. A couple of rubber bands (or in our case hair ties)
4. 4 bamboo skewers with the sharp ends cut smooth.  You wouldn't want a little one to kabob their tongue.
5. A medium saucepan.
6. 1 cup of water
7. 3 cups of sugar (White or brown sugar. Either one works fine.)
8. Flavoring or food coloring if desired.  We used watermelon and grape.

The first step is to heat the water in the saucepan until simmering.  Heated solvents (water) can dissolve larger amounts of salutes (sugar) than they can when cold which makes it possible to super saturate the solution, a necessary step when making rock candy. 

Then stir in the three cups of sugar slowly, a couple of tablespoons at a time, stirring constantly and making sure that each batch of sugar dissolves completely before adding more. 

Once all the sugar is added you can stop stirring.  Allow the syrup solution to heat to a rolling boil. 

Once it reaches a rolling boil, remove it from the heat and dip your skewers in the solution. 
Place the skewers on a plate or on some wax paper and allow them to dry while you divide the solution evenly among your two canning jars.  Then add any flavoring or food coloring you want, making the solution just a bit darker than you want the finished product to be.

Place two skewers in each jar then cover with squares of wax paper, poking the paper over the top ends of the skewers.  Place a rubber band around the wax paper to keep it in place and set the jars up on the fridge or in any area that is out of direct sunlight and where the jars are unlikely to be disturbed.  DO NOT TOUCH THEM even though it's tempting.  The humidity in your area will determine how long it takes for the rock candy to form.  The less humidity there is is the faster the water will evaporate and therefore the faster the crystals will form.  You're probably wondering why it is, then, that we can't set these in direct sunlight as that should speed up the evaporation.  Well, that's correct.  It would speed up the evaporation...too much.  If the water evaporates too quickly then the sugar won't have a chance to form into those nice big crystals that become the rock candy. 


In 3 days to about a week we should have some rock candy suckers to show for our trouble.

Crib Sheets

Winter is creeping in on us and that means there is ALOT of preparing that has to be done.  I'm nearly finished with Middle's sweater.   I've knitted several pairs of socks.   I've canned TONS of food including tomato sauce, pickles, sandwhich spreads, apple sauce, apple butter, pear butter, peaches, apple pie filling, cherries, cherry pie filling, beans, corn, well you get the picture.  

On last nights to do list: warmer crib sheets for Youngest.   Crib sheets really are a simple thing to make.   It's pretty much cutting out a large rectangle from the fabric of your choice, cutting 9 in. squares from the corners, a little sewing, a little heming, a little elastic and presto! Crib sheets!   Ok, so that wasn't a great tutorial.   Here's a better one at make-baby-stuff.com

Here's an example of what your corners should look like after they've been sewn (but before finishing the edges and adding the elastic).


And this is the finished product! 

All told it only takes about an hour and half.   So get over to the tutorial, then head for that sewing machine and have at it! 

Mmmm...muffins

I haven't been doing much crafting the last couple of days.   We have family coming from Florida so I've been preparing food, and lots of it.  
I picked two more buckets worth of apricots today for jam and apricot butter (you can get a decent recipe for apricot butter at The Independent.

I also made and froze two loaves worth of bread dough and picked several onion, tomatoes, peppers and herbs from the garden for salsa.   Tomorrow we'll be going out and picking several ears of sweet corn from the neighbor's.  

Since we've been working our little booties off preparing to have company, I thought it would be nice to treat the kids to one of their favorite breakfast treats, peach cobbler muffins.   Our recipe is from my mother's cookbook but it's exactly the same as the one listed on that website.


Good stuff :D

Cherry Picking Time

The temperature when I woke up this morning was around 75 degrees with a steady comfortable breeze blowing.   It seemed like the perfect day to be out in the orchard picking the cherries.  

I made my peach cobbler muffins and some orange juice then got the kids up and dressed for the day.   I then went outside to feed Cocoa.   The temperature was now 80 degrees and the breeze was coming in frequent bursts.  

Gran and I packed up the kids' bikes, a few blankets, some snacks, a diaper change for the baby, and plenty of water and gatorade for Gran, myself and the kids.   Then we headed out to the orchard.   It was now almost 90 degrees and there was barely any breeze blowing at all.   The humidity was up to 80%.   From there my day went like this:


I got Gran and Youngest settled in the yard out at the barn.   I unpacked the bikes, blankets and snacks/drinks.   Middle took off like greased lightning (does anybody still say that anymore?) on his bike to see Peanut.   Oldest and I went off to the cherry trees to start picking.


Oldest found the tree that she wanted to work from and I found my tree.   Unfortunately ALL three of our sour cherry trees are right smack in the open sunshine.   Needless to say, it was HOT.   Anytime you are out working in the heat water and gatorade or some other electrolyte drink are a necessity and will quickly become your very best friends.   I've seen way too many people forget to stay hydrated and get very very sick as a result.  


Most of the cherries looked pretty good and there were a fair amount of them on each tree, which is much better than how our sweet cherries turned out this year.


In case you are wondering, those are plastic grocery bags hanging from the cherry trees.  The sunlight reflecting from the bags and the movement created when the wind blows helps to scare the birds away from the cherry trees.


Unfortunately, it's been hot enough and wet enough that many of the cherries started to spoil almost as soon as they ripened. 


I picked a total of two full buckets worth (Oldest pooped out after a half bucket and went to ride her bike).  Then it was off to other chores around the barn.


The first on the list was feeding the cows.   This is Herman.   We usually don't name our cows but Herman is a special case since he had to be bottle fed from birth.  He was heading for a drink of water in the cow barn when I snapped this picture.


Then we checked the silos.  Two of the three are, fortunately, almost completely full which is nice since we probably won't get the corn planted this year because of the wet weather we've been having.


Then we had to work on the small tractor.   Apparently something about the transmission was off, don't ask me what...I'm not great with farm machine mechanics.  I'm simply there to hand my husband and father in law the tools that they request.

 
Then it was time to feed Bluebird.


Afterwards I had to coax Middle off of his bike so that we could go and look for his missing flip flops and, after about 20 minutes of searching, they were found and we were headed home.


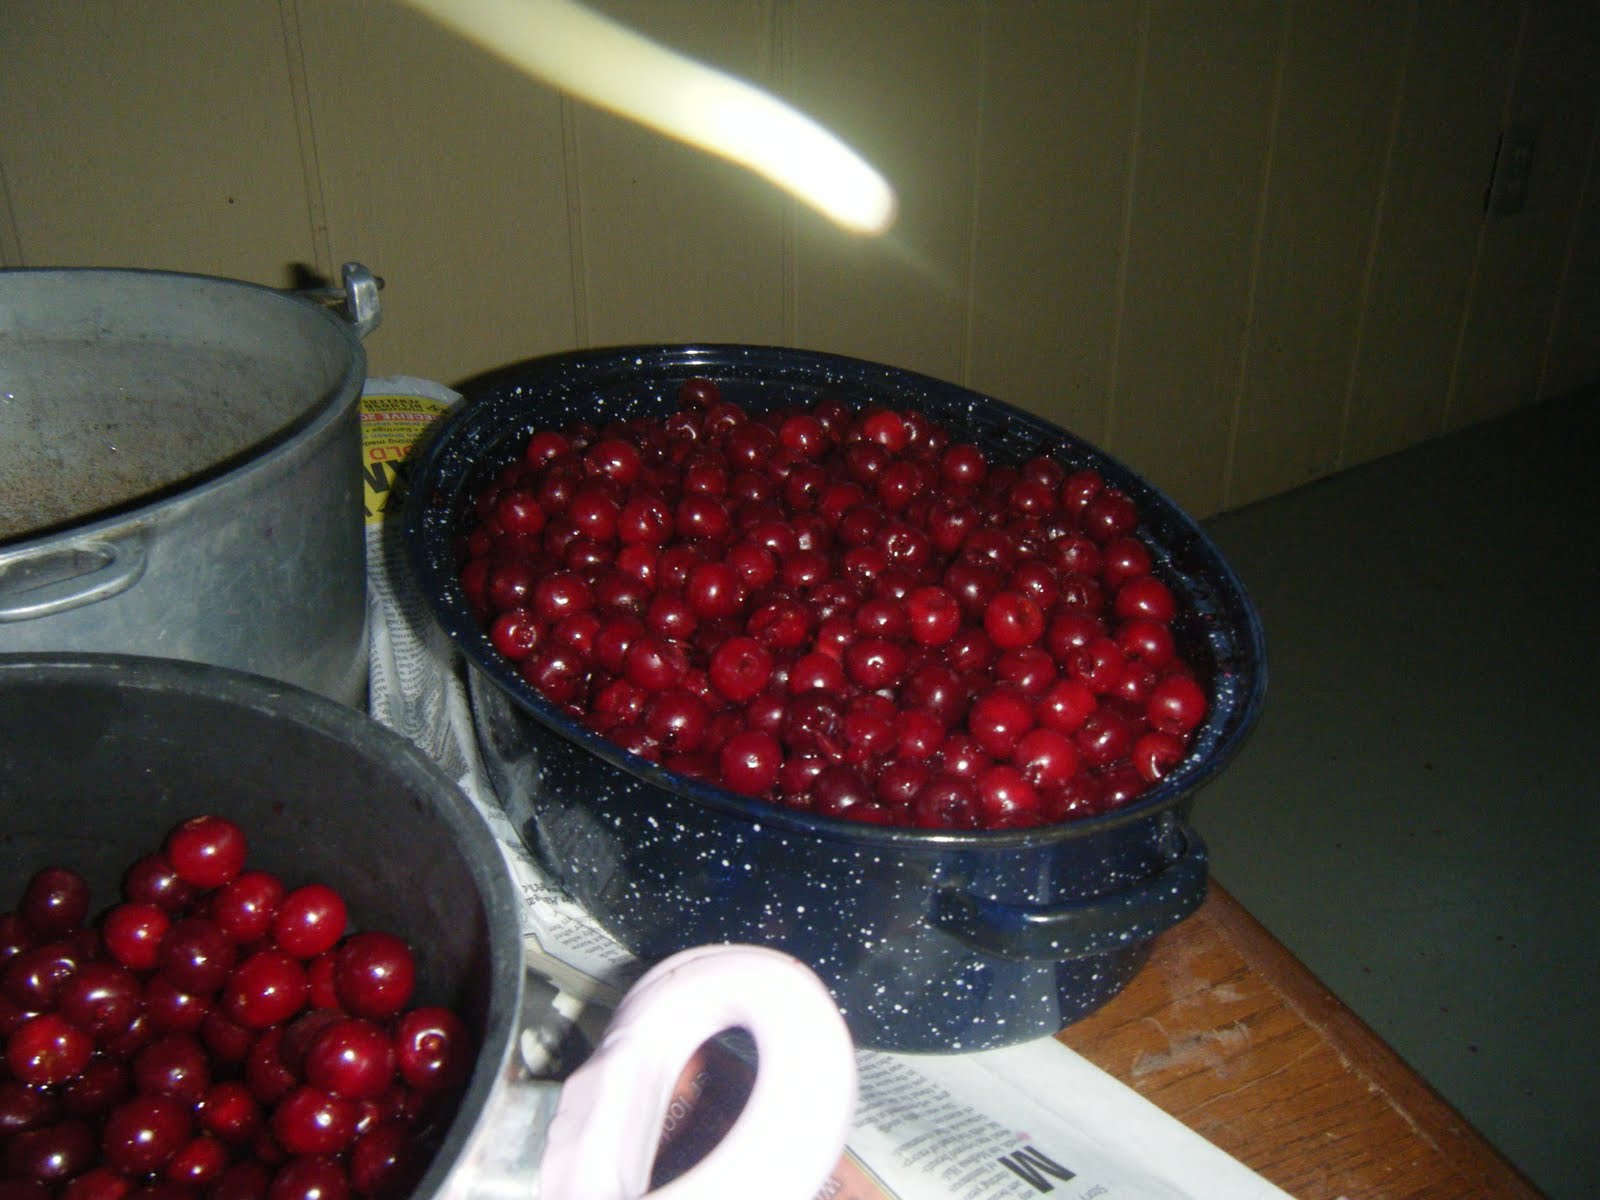
After a long, long day at the barn it was time to set up the cherry pitter.  It's old (about 100 years old) but it does the job.  I like it much better than many of the new ones, mainly becuase it's made out of a sturdy metal instead of glorified plastic AND because it pits two cherries at one time instead of one like most of the new pitters I've come across.


I got all my pots and pans set up for the process.


The whole process of pitting the cherries took about an hour and we ended up with 9 total bags of cherries.  Each bag had 4 cups of cherries in it.


One of those bags was destined for cherry pie tonight which will be our Sunday dinner desert tomorrow and the other 8 bags went into the freezer.

After it was all said and done I was utterly exhausted and I had so much cherry juice splattered on me that I looked like I was the victim of some horrific act of violence.   A warm bath, my bed and a good book are calling my name. 

New Floors and One Very Scary Little Dude


With three days left until Nanny and Pampaw come up from Florida and 4 days left until graduation and 6 days until Youngest Brother's graduation party....DH decides that now is the time to rip up the floors. He started last night, at about midnight (he has the worst timing sometimes) which meant that we had to clear all the furniture out of the way. Which is where the very scary little dude comes in.

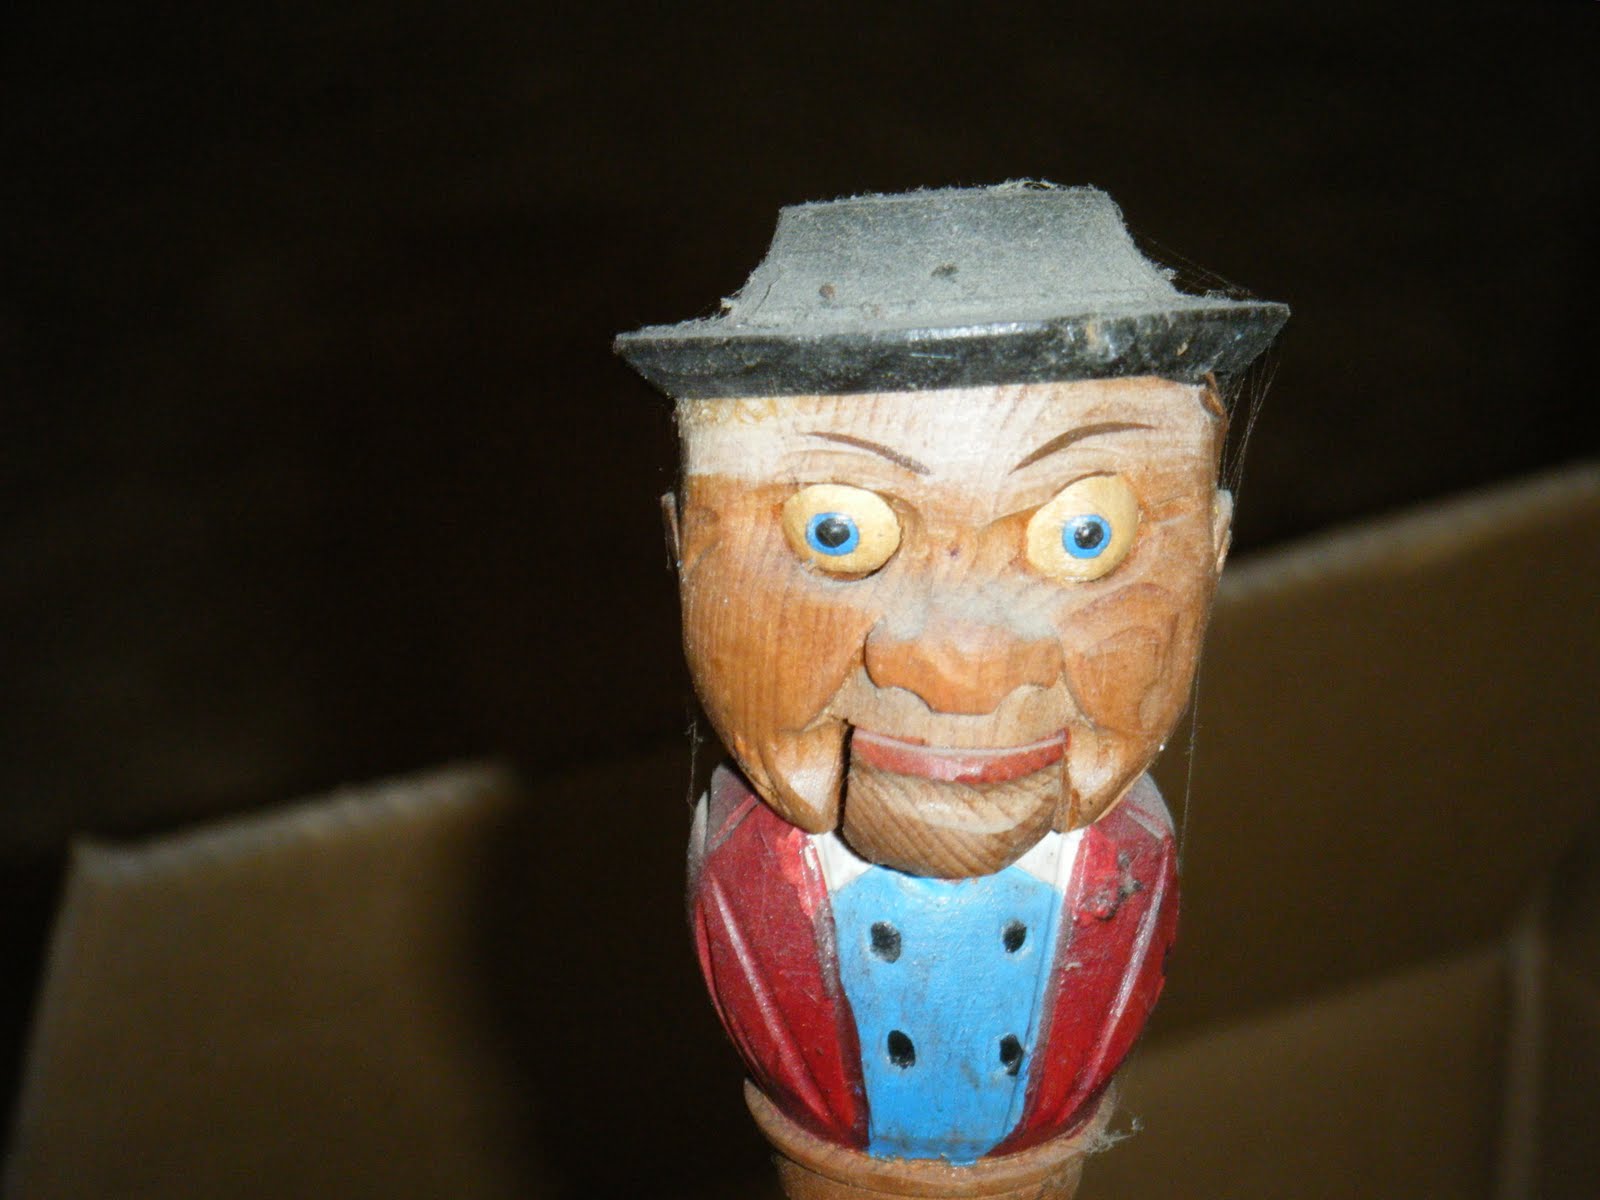
See we inherited this house from DH's great aunt and some of what was her's is still left here, we uncover it from time to time and usually it makes for a nice little surprise. Well this guy was a surprise but I wouldn't describe it as a "nice" surprise.
This is who we found.....


He was completely tucked away and I had never noticed him before.   He is a wine bottle cork.   There is a lever stuck in the base of his skull and if you press it his jaw goes slack open and his eyes roll back in his head. How charming.  My first reaction was "get rid of him".   DH: "But he's kind of fu.."  Me: "Get rid of HIM".   DH: "But don't you think he's sort of funny?"  Me: "No, no I don't.  He's terrifying...throw him out.  Throw him out right now."   In the end I won out and he is now sitting somewhere in the county dump.   Good riddance. 

We finally did get the carpets in the dining room pulled up.   We went from this....

and this...

To this...

We've got the concrete scrubbed and the plastic down and probably tonight or tomorrow we'll have the actual floors down which I'm really excited about even if the timing is bad.

Tomorrow is going to be a hectic day as well because DH is going to pick up Middle Brother from the airport, I have to get Oldest off to school, then I have to pack up the other two munchkins and DH's grandmother so that we can take her (Gran)  to the doctor.   Her leg has been swelling off and on for about a month and starting last week it's been swollen and we haven't been able to get it to go back down.   She's a little bit nervous about the whole ordeal, she HATES doctors and she's also scared they are going to find something seriously wrong so any of you out there who have left over prayers, she could surely use them about now.  

Earlier in this post I mentioned that DH has a bit of bad timing....well, he isn't the only one.   On top of trying to clean the whole house, paint, put in new floors, plan a party, and still cook and take care of the kids, I've also started three new projects.  Two crochet projects and a cross stitch project. Last week I realized that I needed a new top to wear to the grad party but my fabric stash is running low and I didn't see anything there that I wanted to use for a shirt.   I thought about running out to the fabric store but with the new floors and the party we're trying to cut down on our spending for the month.  Instead I decided to dig through my yarn stash and I found some suitable yarn and a free pattern off of Ravelry.  Since this one is for the weekend, it's going to take top priority.  
The second project is actually 3 projects in 1.   The kids found an amigurumi octopus that they wanted me to make for them out of one of my crochet books.   I've got the first one almost finished, I just have to make the rest of his legs.   Then I have to make two more little guys for the other two kiddies.   Come to think of it, I still have to finish the other kitty cat for Oldest's friend and I have to get that done before school is out. Yeesh.  
The cross stitch project is fortunately one that I can take my time on.   I found it off of Amazon for a very reasonable price.   It's cute and whimsical and small so it should be a lot of fun to work on.   I also bought a beginner cross stitch kit for Oldest and have ordered one for Middle.    We have been tackling those projects bit by bit, as time allows. 

Well, that's it for now I suppose.   I'll be sure to post some pictures of the floors when they are put down.   Try not to think about that first picture before you fall asleep tonight...who knows what kind of horrible nightmares that guy will induce.

A Little Housewife Humor