"The greatest fine art of the future will be the making of a comfortable living from a small piece of land."
-Abraham Lincoln
Showing posts with label crafting. Show all posts

Artisan Sourdough Bread and Crochet Sandwhiches

Our Random Acts of Kindness experiment has gone really well.  The kids have really enjoyed getting involved, which is great.  Some of our random acts included cheering on the walkers for the Multiple Sclerosis relay, baking treats for shelter animals and our own furry friends, writing get-well-soon letters to the grandfather of one of Oldest's friends, and picking up trash at the nature center while we hiked.   When we started I thought 30 days would be hard to accomplish but now that we are almost to the end of our month long RAK, it seems like it all went pretty quickly.  Hopefully we have developed some "kindness habits" that will stick around for awhile.

I had mentioned in a previous post (although I don't remember which one) that I was knitting and crocheting play food for the kids to use in their toy kitchen.   Well, I finally got around to taking pictures of the sandwiches I made for them.
Peanut Butter and Jelly. 

 
 The jelly in the picture came out looking a little blue but in reality it's purple (grape).


Sandwich number 2.


This is the ham, roast beef, cheese, lettuce, tomato and pickle sandwich.


The bread and peanut butter and jelly pattern came from craft frog.  The ham and tomatoes I found on the lion brand website (free membership required).  The roast beef was my own adaptation of the knit ham from lion brand. However, instead of knitting in stockinette, I knitted it in garter stitch.  The lettuce pattern comes from the hook, yarn and needles blog.  The pickles were my own creation.  A simple crochet in the round pattern with single crochet stitches.  It took me a weekend to make and the kids LOVE it.  


I've also been baking more bread.  Making bread and noodles seems to be the majority of my time spent in the kitchen these days.  Recently I tried my hand at artisan sourdough bread.  


I really like the process of making the artisan style loaf, which is totally different than the traditional loaf I usually make.   There were fewer steps with this loaf of bread than the traditional loaves.  No kneading was necessary and it only had to rise once.   I appreciated that fact tremendously.  However, I've learned from this experience that I'm not a big fan of sourdough bread.  I do not like it Sam-I-Am and neither do the kids.  Hubbs thoroughly enjoyed it though.  He ate half the loaf on his own the first day.  He ate the other half the second day.  So for his sake alone, I'll be making it again some time.  For the rest of us, maybe I'll try a rustic white bread next time.  I think the sourdough flavor was just a little too robust for my liking. 

Bracelets

My trips to Wal-mart usually are few and far between and typically consist of me heading straight for the produce section or the pharmacy aisles.  It's not that I don't like Wal-mart, I just don't really have much use for it.  I don't go grocery shopping all that often and when I do I usually go to our local Meijer.  So, the fact that I took a meandering walk through Wal-mart last night was pretty unusual for me but I'm happy I did because I found some really cute buttons and picked up some fairly inexpensive yarn at 2 a.m.   Really can't do that at too many other stores. At least something good came out of these bouts of insomnia.

 So while I was sitting awake looking at my new little baubles I decided to put them to good use and made a crocheted bracelet.  I used a simple pattern of just plain double crochet with a single crochet border, it was 3 in the a.m. by this point after all, intricate patterns were just not feasible accomplishments that early in the morning.

The button really makes the bracelet, I think.  I have several patterns now saved in my Ravelry favorites folder that include more intricate patterns and some knitted patterns.  It's kind of nice to spend a  little time making things that are just for fun every once in awhile.   Time well wasted.  :)

Monkey In The Middle

I just finished the monkey square for youngest's "monkey in the middle" knitted afghan.  The square is actually intended to be an 8"x8" dishcloth but I increased the size a bit by using a much larger needle (size 7 US) than what was called for in the pattern so my square ended up being about 10"x10". 
The square is super cute but the pattern, which you can find for free here, is not one for mindless knitting.  If you intend to make a square while watching some super exciting movie on TV then this is one you'll want to skip.  The stitches are easy, no lace or eyelets, just plain knit and purl stitches so if you have the time and quiet to be able to focus just on the knitting for awhile then this is definitely worth it.  It took me about 12 hours to complete the whole thing and that was with the usual distractions that come with three kids, although some things, like my sink full of dirty dishes, got pushed to the back burner for the sake of this monkey. 

The plan is for this to be the center square (hence the monkey in the middle moniker) surrounded by plain, solid squares in this blue and a complimentary green.  I'll have to make about 34 plain squares if my calculations are right but those should work up pretty fast since they are going to be just stockinette stitched squares with a popcorn border to match the monkey square.

P.S. In case anyone is wondering, the monkey is symbolic.  DH and I affectionately refer to each of our children as Monkey #1, Monkey #2, and Monkey #3 due to their climbing, jumping, running, and general tendency towards wreaking good natured havoc.

Alas, it's finished!

I finished staining and hanging the first gourd birdhouse of the batch a couple of days ago.  I used an acrylic stain and finished it with about 4 coats to get it to the desired color.

The picture came out a little dark but you get the idea anyways.

Now I just have to finish Oldest's birdhouse that she's entering for the fair.  She decided what birds she wanted to attract and I cleaned, drilled and grinding the opening for her.  But I have to smooth it out a bit.  Then she's planning to paint it with her own design.  We still have a few weeks though, entries don't have to be in until near the end of July.  Hopefully we'll have enough time that if we screw up this one we'll be able to make another one in time to turn it in. :D


Cleaning the Inside of a Gourd

I've gotten the outsides of all of the gourds completely cleaned and scraped down and ready to go.  Last night I worked on the first birdhouse of the batch.  Now if you are going to make a birdhouse, bowl, jug, drum, etc. out of dried gourds (anything that requires large-ish open holes) you will need to clean the inside of the gourd as well as the outside.
The paper like stuff inside the hole is the pith.  It's usually moldy and gross. 

Not to sound redundant (in other words, yes I realize that I said this in the last post but it bears repeating) but you will need a dust mask of some kind...something more substantial than a bandanna or dew rag or t-shirt tied around your face.  I strongly suggest a full on respirator, I use one-P100 hot pink filters and everything.  At the very least you will need a dust mask made for filtering fine particulate matter. 

The other tools I use for cleaning the inside of a gourd are my trusty variable speed dremel tool with various sized grinding/sanding attachments (a drill and a hand saw or handheld jigsaw/router would work fine too).  I like the variable speed dremel because it cuts down on the amount of dust and offers better control.  I also use an old jigsaw blade, curved awl, and a thin wire brush.

For making a birdhouse the first step is to drill four small holes into the bottom of the gourd to help ensure proper drainage, it is a birdhouse after all not a birdbath. The next step is to determine where you want to place your opening.  I use a compass to draw a circle that is 1"-1 1/2" (the type of bird you want to attract will determine the size of hole you need to drill...check out a chart here) in diameter and use a pencil to mark the center of the circle. That's where you'll drill your starter hole. Then you need to drill two small holes into the handle of the gourd for your hanging wire, leather strips, strong string or whatever other sturdy material you'll use to hang your birdhouse.

I use the various grinders and sanders for creating the hole opening instead of a jigsaw or handsaw in part so that I can sand the hole opening while I'm making it...you know, killing two birds with one stone and all that...sorry for the poor choice of idiom but you get the point.  Anywho, once the opening is made it's time to clean out the inside of the gourd.  I use the old saw blade to break up the pith and the seeds and I shake out the loose material.  Then I use the awl and wire brush to loosen and grab whatever is left for a completely clean result.  Some people leave a bit of pith in the bottom to help the birds gain footing.  Personally the birds that come to my birdhouses never seem to have any trouble with footing without the pith and the one or two times I've left some in there the birds usually throw it right out anyways. Ultimately though the choice to pith or not to pith is really one of personal preference.

The inside of the gourd after it has been cleaned and the pith has been removed.

That's it, now the gourd is officially cleaned. After it's cleaned you can finish it off by painting or staining it and sealing it and it will last for decades. 
Finished (or nearly finished) product. Please ignore the extremely cluttered work table :)

Gourds

Most of the gourds that I set aside to dry are ready.  There are only two that aren't quite dry yet and will probably need about another week or so. 

  The outsides of these gourds have already gone through two of the three (or four..depending on the project) cleaning processes that I use.  They've already had their warm spongebath in sudsy dish soap water.Got rinsed off and then dried again in the sunshine (what little we've had lately) and they've soaked for an hour or so in 1 cup of bleach (vinegar works well too) to one gallon of warm water. 
  Little word to the wise...gourds float.  So if you are going to soak them make sure to either put them in a nylon sack (think pantyhose) that already has a brick or heavy stones in it before putting them into the water OR place a wet rag over the tops of the gourds after you put them into the water.  You just need something to hold all parts of the gourd under the water.
   Once they've soaked in the bleach solution I use a copper pot scrubber to gently rub all over the surface of the gourd to remove all the more stubborn mold that sometimes sticks to the gourds. Sometimes it takes a little doing.  I hadn't gotten to this part of the cleaning process yet when I took the above pictures.
   The mold frequently leaves a moddled stain on the gourd, it's part of it's charm.  If you want to stain the gourd you will want to finish the outside cleaning process with a bit of fine grit sandpaper worked in even, gentle circular strokes all over the gourd.   If you don't do this step and try to stain the gourd the waxy outer skin will likely mess things up for you. Be aware though that sandpapering the gourd also removes some of the moddling left by the mold.

If you are leaving the gourd whole without cutting, carving, or drilling into the gourd in anyway then you can stop here.  Otherwise, you will need to clean the inside of the gourd.  That's a tricky...and potentially dangerous process. Before you even THINK about starting to do that you will need to get a good quality dust mask or, better yet, a full blown respirator and some safety goggles. The inside of gourds always contain dust and usually contain some nasty molds, fungus, sometimes bacteria etc. that can cause nasty things like infections, gourd flu (really sucks), allergic reactions...sometimes anaphylactic in nature. So, yeah, be smart and be safe about all of this. I'll get into how to clean the inside of the gourds later on...for now I'm off to watch "How the States Got Their Shapes" on the History channel because I'm one of those dorks that really LOVES those kinds of shows.

Odds and Ends

Well, after tearing out my knitting twice more since my last post, I'm finally making some decent progress and I admit that I've learned alot about intarsia knitting in the process.  


That is what I have done so far.  Hopefully by tomorrow I'll have it nearly completed but that all depends on how much free time I get after church. 

I also made a run to Joann Fabrics today and picked up a really cute "quilt in a box" on clearance.   I have been wanting to make a lap quilt for a good friend of mine for a couple of months now but couldn't find the time to get the fabric and start cutting.  The nice thing about the quilt-in-the-box is that the fabric is all there for me (except the backing fabric and batting but that's no big deal) and it's all cut and ready to go.   Should move fairly quickly from here.  


Beyond that we've been starting to look through our seed catalogs and online to start to plan this spring's garden.  I'm thinking that we are only going to add a handful of new items this year including a "flat wonderful" peach tree and some "sugar baby" watermelons.  I can't hardly wait for this snow to disappear so I can get out there and dig!

American Girl Doll Nightgown

My days have not been completely void of crocheting.   I finally finished one of the several projects I've been working on last night.  Oldest wanted a nightgown for her doll so I found a cute pattern at Bizzy Crochet.  


This Christmas the majority of our gifts are going to be handmade gifts so I will be making several more doll clothes, several amigurumi animals, several play food items and hopefully a couple of hats and sweaters over the coming months.   Trying to get all of these things finished should be pretty interesting. 

Getting Ready for School

We've hit that time of year again, where it's time to start getting the kids back into school mode.   I don't introduce the workbooks usually until closer to the start of the traditional school year but I do start getting the kids used to the structure and routine that we have about now.   One of the ways I go about doing that is to start to give them short bursts of structured, focused play time.  
Yesterday Oldest spent her time building with some k'nex (and secretly learning how to follow directions from a pictures).   By the time her focused playtime was finished she had already built two butterflies, two fish and a dinosaur and still didn't want to stop.   So she spent about an hour AFTER her focused playtime building a hanglider.

Her dollhouse "father" is taking a harrowing ride.

And in orchard news:
One of our young peach trees "exploded" this year growing up and out and getting a tree full of fruit.  Unfortunately, it had more fruit than it's young little branches could handle and it started to bend almost all the way to the ground.


It's kind of hard to see in the pictures.

I ended up having to throw off about 40-45 peaches to ease the weight on that limb.   I wasn't really happy about that fact but "ya' gotta do what ya' gotta do, ya' know?"    In about an hour I'll be heading out to the bigger, established trees and picking peaches and plums for much of this afternoon.   Should be fun...maybe.  

Bracelets

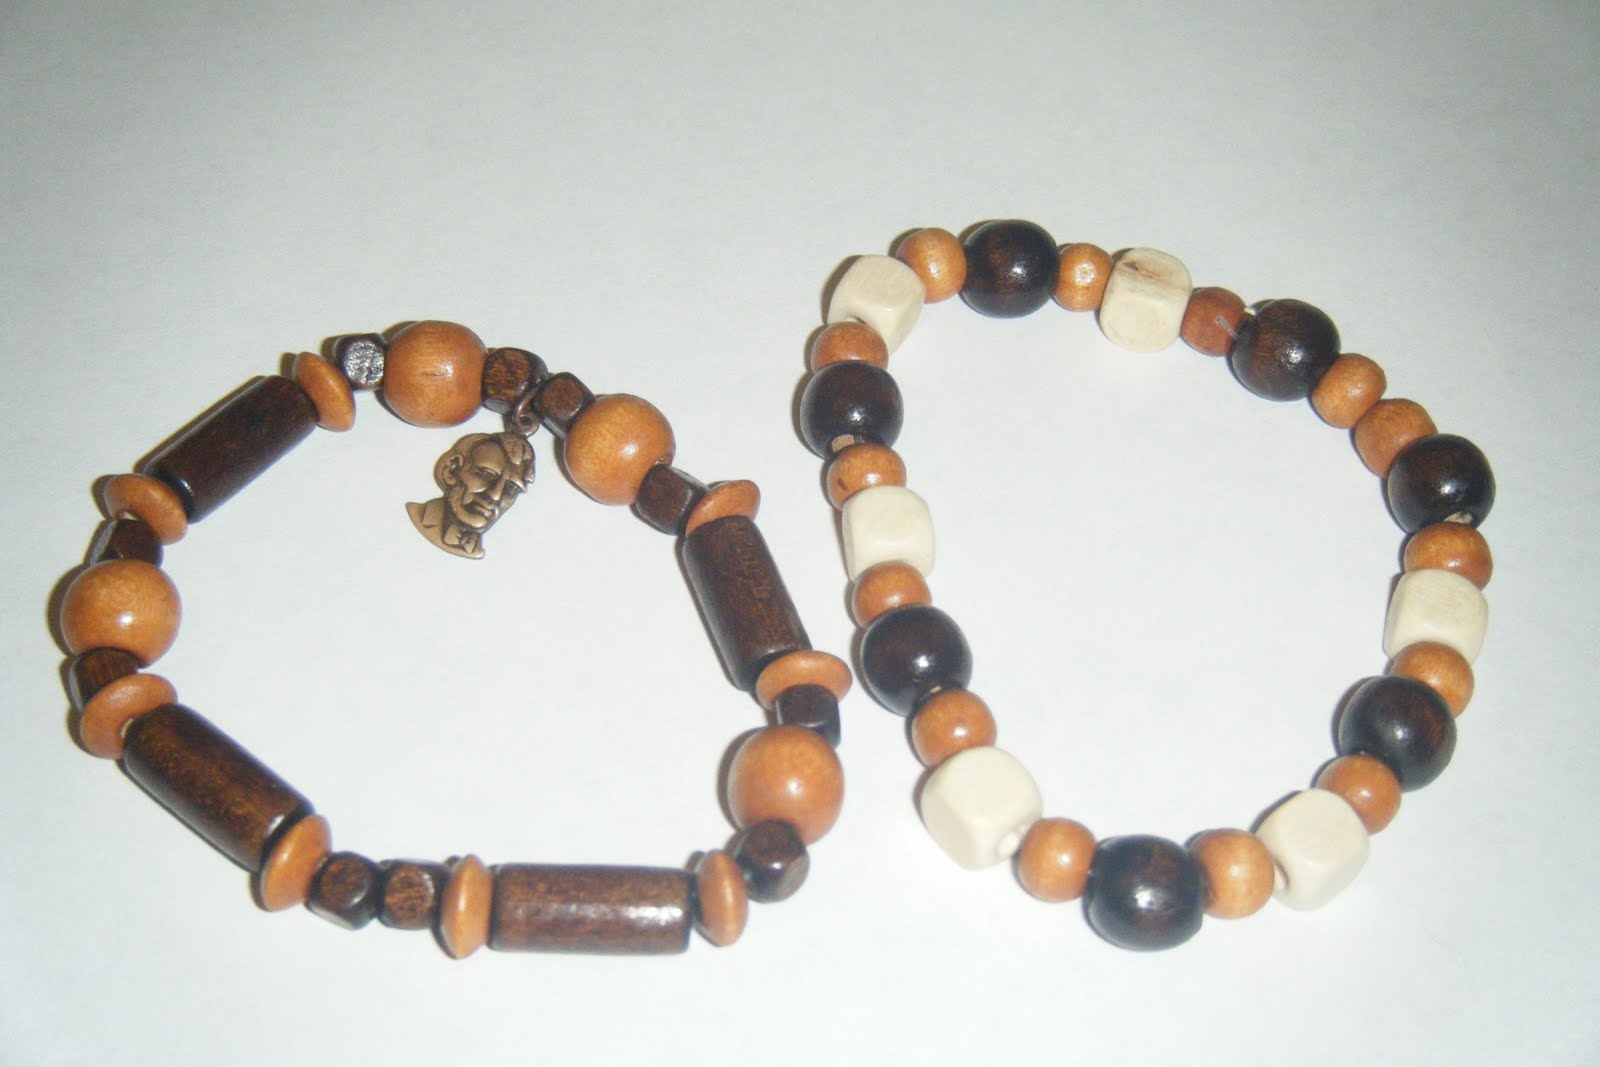
I decided that I needed something to do with the extra beads that I had left over from my knitting needle making extravaganza.   I headed to my garage and found some "magic" elastic cording for bracelets, rings, ankle bracelets, etc.  
I made these two bracelets out of the smaller beads in my bead packet.


While on Etsy a few weeks ago I found these really cute Abraham Lincoln brass charms.  They were only about $1 for a set of four of them.  After shipping they came out to be about a dollar each.  Worth it because I like them so much.  ANYWHO, I decided to put ol' honest Abe on one of the bracelets and I also made a necklace out of one of the charms (I may get a picture of that up at a later date). 
Oldest now wants an honest Abe bracelet of her very own so that will be my next jewelry making venture.   We can go out with matching Presidential effigies.  

I also finished my knitted prayer square for a prayer square swap I'm participating in on Ravelry.   Unfortunately I didn't snap a picture of it before I sent it out.   Oh well, I'll have to remember that for next time.  

The Dachshund Says Hello!

Oldest snapped this picture of Chandler the other day.  It was so funny that I had to share it.


Life here has been a flurry of doctor's visits.  Youngest developed a rash on our first day of cherry picking.  Initially I just assumed it was heat rash since the temps were in the high 80's that day and the following days when we were out picking. 
But when it was still there about a week later I began to get a little suspicious. 
On Saturday the rash looked like it was getting a little bit worse.  I decided that I would take him in to the doctor on Monday to see if we could figure out what was going on.   An hour later I put him down for his nap and went to work on some of the knitting and crochet projects I have going.   Youngest slept for about an hour and then Oldest got him and brought him out.   At first I thought he had been in some sort of terrible accident.   Both of his eyes were swollen practically shut.   His rash had spread and started to form large hives all over his back, chest, belly, and shoulders and he just generally acted like he didn't feel well.  DH and I decided that he needed to see a doctor before Monday and took him to the urgent care.  

The urgent care promptly refused to see him (too young) and sent us to the ER.  So there we sat for about 3 hours.   The doctors and nurses were very nice and they even gave Youngest a brand new cow shaker toy and referred to him as "their little man".   It was really cute.   The nurses really enjoyed coming into our curtained area and playing with him.   The doctors ran a strep test on him and asked us a bunch of questions about what he had or had not been exposed to etc.   Finally we were told that the strep test was negative and were given the diagnosis of "allergic contact dermatitis".   He was given a prescription for benadryl and the baby version of prednisone and told to follow up with his pediatrician within the next couple of days.

On Sunday the rash looked even worse than it had on Saturday and by this time it had spread to his face and arms and legs.  His back and chest were completely red, they had become one giant hive.  The swelling on his eyes had gone down but he looked like a little leopard boy with all of his spots.   The medicine did seem to help some though, at least for a couple of hours.  But after the meds wore off he was back to his old spotty self.  

By Monday his back and stomach were mostly clear but his eyes were once again swollen and the spots on his face and head were much worse.   The spots on his arms and legs were also worse and he now had spots on his hands and feet.   And he was itchy.   On top of that he had developed a slight fever and his little voice sounded hoarse.

On Tuesday we went in for his doctors appointment.   By this point he looked much better.   He still had several light spots on his arms and legs but the swelling was gone and his face, back and stomach were almost completely clear.   His fever also seemed to have subsided although his voice was still a little hoarse.  The doctor claimed that it must be the result of some food allergy and sent us home with another prescription for benadryl. 

When we got home from the doctor, Gran informed me that the ER had called with Youngest's test results.   This surprised me since I thought we had gotten all of his test results when we were there.   Apparently they called almost as soon as I walked out the door for the doctor's appointment.   I called the number that they had given and talked to one of the nurses that had seen Youngest on Saturday.  Low and behold his rapid strep test had actually grown strep.  It was a positive.  The boy was not suffering from some unknown allergy after all.  He was instead having an allergic reaction to the toxins released by the strep bacteria.   They called in a prescription for amoxicillin (the very antibiotic that both of my older two children are deathly allergic too and DH is moderately allergic too. Needless to say giving this medicine to Youngest makes me a bit nervous and we watch VERY closely as a result). 

So here we sat with little mister contagious walking around getting extra hugs and planting big wet baby kisses on everyone's faces while we were blissfully unaware of the lurking bacterial baddies that were living in his throat.   
Oh well, I'm just glad that they did catch it.  I had strep throat as a child that went undiagnosed too long and I ended up with scarlet fever.  I was in bed for almost 10 days.   It was a miserable experience and one that I wouldn't wish on my worst enemies let alone my own children.   Fortunately for me, once you've had scarlet fever you develop an immunity (usually) and you can't get it again. But that wouldn't have done Youngest any good if they wouldn't have caught the strep to begin with.

Somewhere in the middle of all of this I did manage to finish a 12" crochet square that I am planning to use to make a tote bag that will be used to carry the older two kids' things to their swimming lessons and back. 


The pattern for this square was found on crochet pattern central in the 12" square section.  Unfortunately, for the life of me, I can't remember the name of it but it is there.  So if you are interested in making one you just have to look through the squares patterns until you find it.   There are some beautiful patterns there though, so the hunt should be pretty fun. 

Toy Train

I bought Middle a Creativity For Kids Make Your Own Train kit earlier this week.
We spent this morning building it. 
This sort of thing is right up his alley since he likes loves anything with wheels and he loves building/working with his hands.  

The train before Middle glued on the wheels.


Middle is a fairly rambunctious little squirt but when it comes to projects like this one, he can actually sit still, concentrate and work quietly for a quite a long time.
Which means a nice break for Momma ;)


Painting his masterpiece.


This is the finished product.   The paint job is completely custom xD
I helped him spell out his name and then he picked out the number 4 sticker (for his age) and the heart. 

It has now been run into every wall in our house at high speed and it's still holding together.  I'm fairly impressed, I think it was definately worth the $3. 


Octopus

I finished Middle's octopus.  I used a pattern out of Tiny Yarn Animals: Amigurumi Friends to Make and Enjoy.   By Tamie Snow.  

I'm about half way through my shirt and should have it done for the graduation.  If I have time I may sew up a skirt to go with it.   But that's a pretty big if. 

I've finally finished all the cleaning that I need done for the party, except for the bathroom.  It's amazing to me how quickly two small children can destroy a clean bathroom.   I finally have some time now to relax, watch some Cheers reruns and do nothing, absolutely nothing.  :)

Rainy Days

The weather around here today was nothing but dreary and gross.  As a result the kids were stuck inside and all I heard was "I'm bored"  "Sooooo bored" "This is boring" "I'm bored, why can't we go outside".    So we decided to make a playhouse.   We used the box that our new dishwasher came in and I cut out a door and a little window on the side.
Pay no attention to the messy floor of their bedroom.  They just cleaned it up enough so the floor was actually visible yesterday.


Then they grabbed their crayons and colored pencils and went to town "painting" their house.


After they were finished decorating they played in it for several hours while I cleaned the bathrooms.  So at least I was able to get some work done today.


One Pair of Baby Pants Down...Several More to Go

These pants are seriously one of the easiest sewing projects out there.   A beginner could make this with virtually no problems at all and a more experienced person could turn out several in one day.


For Youngest's pants I used the monkey print flannel fabric that I've showcased on here previously but you could use really any fabric that is suitable for clothing, including old adult sized t-shirts.

There is a detailed tutorial at the handy home projects blog.


Spring is in Bloom.


Our cherry trees decided to take the peach trees' lead and blossom out today.


Spring flowers always remind me of my favorite Albert Laighton poem:

They are autograph's of angels, penned
In Nature's green leaved book, in blended tints,
Borrowed from rainbows and the sunset skies,
And written everywhere--on plain and hill,
In lonely dell, 'mid crowded haunts of men;
On the broad praries, where no eye save God's
May read their silent, sacred mysteries.

Thank God for flowers! they gladden human hearts;
Seraphic breathings part their fragrant lips
With whisperings of Heaven.

The poem is aptly named "Flowers". :)


On the homesteading front we've been easing into the spring rhythm of things.   We have several plants started and ready to go.  DH plans to till the garden tomorrow and then Oldest, Middle and I will work to transplant the seedlings into the garden over the next day or two.   Chandler is itching to get to work clearing the garden of all the typical garden pests.   We're still working with Cookie to get her fully trained in that department but she's making big strides.  I think we'll be able to let her loose in the orchard by the end of the month.   Both of them worked together yesterday to snuff out one of the many voles that has taken up residence in our yard.   They made pretty quick work of him. 

 Typically, when the dogs are working, they run through our orchard at the farm and our garden here at the house barking incessantly into each hole created by some rodent until we give them the commands to stop. The trick is getting them to bark and dig only at the rodent holes, not just dig up the entire garden.  We'll do that every day for about 3 weeks at the beginning of Spring.  Ordinarily that harrassment is enough for the rodents to leave for the remainder of the season but these voles in our yard are particularly stubborn.  They aren't doing as much damage as they were when we first moved in but they aren't gone yet either.   The stress must at least be interrupting their mating cycles because the number of vole tunnels has decreased significantly and Chandler isn't dragging up as many as he had done in years past.  

We've purchased new floors since our carpet has gotten to the point of no return.   Even though it wasn't my first choice, we opted for laminate floors simply because of the durability issue.   We wanted a floor that would withstand the hazards presented by children (ie. matchbox cars being dropped onto it, roller skates speeding across it, juice spills, mini wrestling matches, among other things) and the dangers posed by pets (nails scratching across it at a high rate of pace while two dachshunds attempt to rocket themselves towards a squirrel sitting outside of a window).  With those things in mind, we decided that laminate really was our best option.   Hopefully we'll have that installed within the next couple of weeks.

On the crafting front things have been pretty quiet.   I saved the egg cartons from the Easter egg dying extravaganza and plan to let the kids to a couple of projects with them over the next couple of days.   I've gotten some work finished on The Afghan from Hell and some done on Youngest's sweater.   I also have 2 pairs of light summer pants for Youngest and Middle cut, pinned and ready to be sewn so hopefully I'll be able to get that done within the week although it may be a little dicey considering the moving and packing that will have to be done in order to get the floors in.  


Fairy Houses

Since the weather has turned nicer the last few days, the kids have begun to head back outside for the majority of their day. One of their favorite things to do outside is build fairy houses (I found the idea off of a magazine, unfortunately I no longer remember which magazine.) They build them out of the items that they find outside or in the garden and occasionally small items that they find in the tool shed. They build the fairies their homes, decorate them with bits of found "furniture" (short, fat sticks for sofas, leaves for a bed, etc.) Then they fill them up with "fairy food" which lately has consisted of unsalted peanuts and clovers.

This is their most recent fairy house.  It's just a broken pot, tree bark for a roof and a door, and an old tuna can swimming pool. 
They used all sorts of thing to decorate the inside from rocks and twigs to old hallowed out walnut shells.


And this is Chandler drinking from the fairy pool. :)

They love to come outside the next day to check to see if the "fairies" have eaten their food and possibly rearranged the furniture.  In the case of this house, they had and they had even knocked the door clean off the side of the house.  They also left tracks in the mud that looked suspiciously like squirrel tracks. lol.

And in recent puppy news:
They have finally hit the 8 week mark have gotten all their shots and their wormings and should be ready for their new homes by next week at the latest.

And since nobody can resist cute puppies, here's some more pictures for everyone.


I Still Exist

I haven't posted in awhile but to be honest, I haven't had anything to post about.   I was suffering from project overload and took a bit of a break from crafting for a couple of days.   I started back up this afternoon though and am currently working on another preemie hat to be sent with the previous preemie hat (I had originally planned to send that out awhile back but the snow and bad weather has prevented me from venturing out any more than necessary).

And in other news, we've finally ordered the last of the seeds.  We were collaborating with my FIL to find some more interesting, exciting things to plant this spring.   So far we've ordered Cherokee White Eagle dent corn, which is a really deep blue color kernel.  The neat thing about this particular type of corn is that some people claim they can see a white eagle image in the corn kernels.   It sounded to intriguing to pass up.  We also ordered Daymon Morgan's Kentucky Butcher corn which has huge, multicolored ears and stalks that can get up to 18ft. high!   

However, out of all the seeds we ordered, I'm most excited about the cotton.   Yes, you read that right, cotton.  In Ohio.   We purchased Erlene's Green Cotton.    I was reluctant because I was under the impression that you cannot grow cotton as far north as Ohio.   BUT, my FIL reassured me that he has indeed grown cotton here in ohio.   Apparently you can grow cotton as long as it has one of the shorter (relatively speaking) growing season.  

I figured that, living in the midwest, I would just have to accept the fact that I wouldn't be spinning cotton unless I purchased cotton roving.  So you can imagine my delight when I find out that it can be done.   If all goes well, by this time next year I will have spun a bit of my very own homegrown cotton fiber. 

Some New Projects

It's been nothing but cloudy, rainy, and downright dreary around here lately.  It was unusually warm yesterday and today but, to quote Dr. Seuss, "The sun did not shine. It was too wet to play. So we sat in the house..." and we made sculptures!


This is the before picture (note the newspaper. Multiple layers are necessary if your doing this project with kids that are anywhere near as messy as mine)
We used a homemade self hardening clay recipe:
4 cups of flour
1 1/2 cups of salt
1 1/2 cups of water
Mix together in a large bowl until a dough forms and you have self hardening clay.
After your finished modeling and sculpting away, allow the clay to sit in a warm dry place for about 2 days (depending on the thickness) until completely dry.
The sculptures seen above had been drying for 3 days.


Once they were completely dry I mixed about 1/2 cup of white vinegar to 1 package or kool aid to make a nice stain.
Then I gave the kids free reign to "paint" their sculptures to their heart's content.
The picture above are the finished products.


On a more grown up note, I've finished one comfortghan for one of our local nursing homes.  


It's large enough to fit a full size bed and fits a standard size nursing home hospital bed with a little extra hanging over the edge.


I really loved the colors in this afghan.
The variegated green, brown, tan and white yarn just makes me feel happy.

We also recieved a wonderful gift on Saturday.  


A beautiful, light, and lacey baby afghan from my very talented aunt.
I love this because the color would work well for a boy or a girl and it's nice to have something a little lighter weight to wrap Youngest in when we are inside.

All in all it was a pretty good weekend.  I hope you all had a wonderful weekend as well.